![]() 個人向けトップ > お客様サポート > ソフトウェア > SOUNDSLAYER Engine > 基本操作ガイド
個人向けトップ > お客様サポート > ソフトウェア > SOUNDSLAYER Engine > 基本操作ガイド
 SOUNDSLAYER Engine | 基本操作ガイド
SOUNDSLAYER Engine | Basic Operation Guide
SOUNDSLAYER Engine | 基本操作ガイド
SOUNDSLAYER Engine | Basic Operation Guide
はじめに
Introduction
- SOUNDSLAYER Engineは Windows / macOS / Android / iOS の4つのプラットフォームに対応しています。
- 本ページでは全OSと全製品の使い方を掲載しています。
- ページ上部の「アプリ(OS)」や「製品」を選択すると、選択した条件に合った情報のみが表示されます。
- 基本的な操作方法は共通ですが、プラットフォームごとに異なる内容がある場合は各説明文で個別に案内しています。
- 製品名の「SC-」を省略する場合があります(例:SC-GNW30 → GNW30)。
- 記載内容は各プラットフォームの最新バージョンに基づいています。最新でない場合は画面や操作が異なることがありますので、最新バージョンをご利用ください。
- The SOUNDSLAYER Engine app supports four platforms: Windows, macOS, Android, and iOS.
- This page covers usage for all supported OS and products.
- Select "App (OS)" or "Product" at the top to filter relevant information only.
- Basic operations are common; any platform-specific differences are noted in each description.
- The product name may omit "SC-" (e.g., SC-GNW30 → GNW30).
- Content assumes the latest platform versions. If not updated, screens or operations may differ; please use the latest version.
画面の構成
Screen Layout
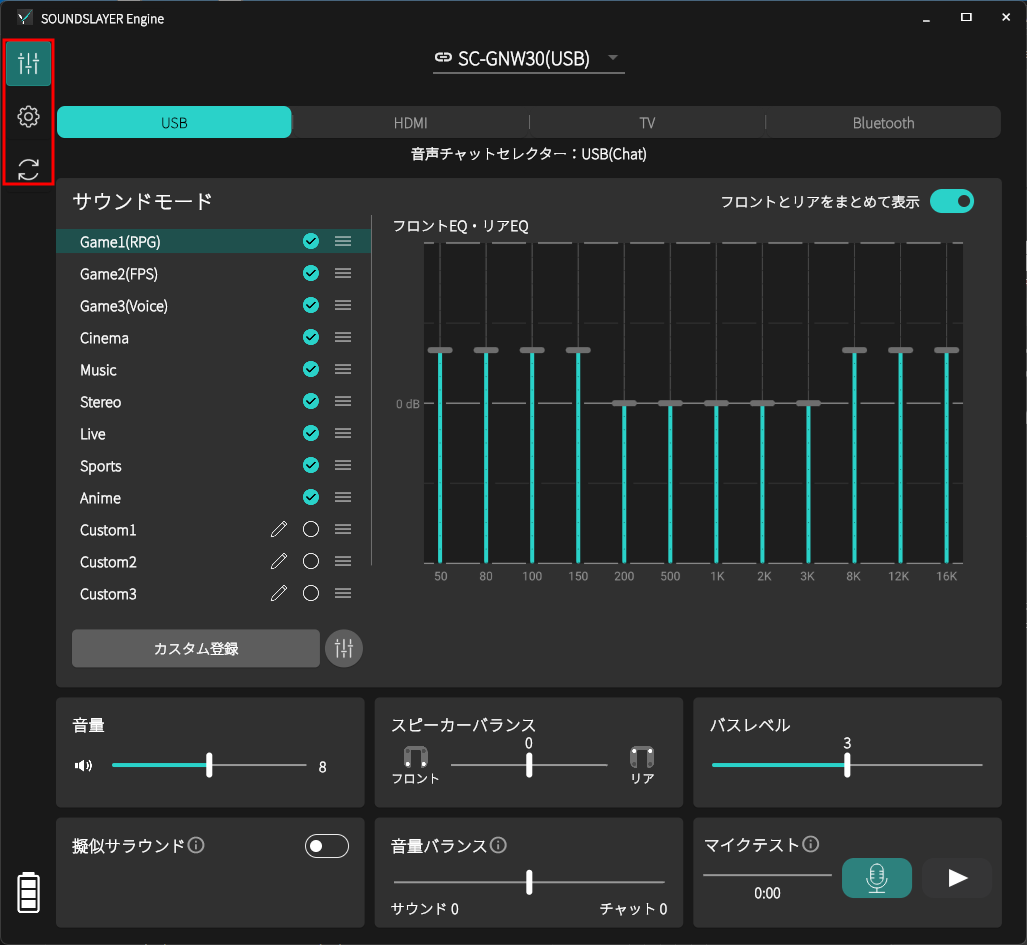
SOUNDSLAYER Engineは、次の3つの画面で構成されています。
SOUNDSLAYER Engine consists of the following three screens.
|
サウンドコントロール画面
Sound Control Screen
|
本体のサウンドに関する操作を行います。
Allows you to operate the sound functions of the main unit.
|
|
|
設定管理画面
Settings Management Screen
|
本体やアプリの設定の表示や変更を行います。
Displays and changes settings for the device and app.
|
|
|
お知らせ画面
Announcements Screen
|
お知らせを表示します。
This screen displays announcements.
|
|
|
ファームウェア更新画面
Firmware Update Screen
|
本体のファームウェアを更新します。
Updates the firmware of the main unit.
|
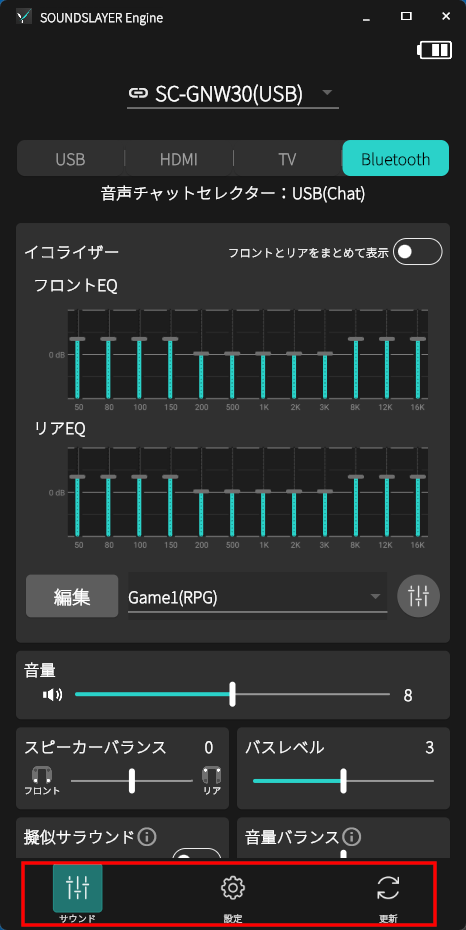
各画面は、画面左端または画面下部のタブアイコンで表示を切り替えることができます。
There are two types of layouts: "Standard Layout" and "Vertical Layout," depending on the screen
width.
You can switch between screens using the tab icons on the left edge or at the bottom of the screen.
You can switch between screens using the tab icons on the left edge or at the bottom of the screen.
|
標準レイアウト
Standard Layout
|
縦向きレイアウト
Vertical Layout
|
|
|
[お知らせ]
画面の横幅を狭くすると、自動的に縦向きレイアウトへ切り替わります。(Windows / macOS 専用)
スマートフォンは縦向きレイアウト、タブレットは標準レイアウトで表示されます。(Android / iOS 専用)
[Notice]
When the screen width is narrowed, it automatically switches to vertical layout. [only Windows
and macOS]
Smartphones display in vertical layout, while tablets display in standard layout. [only Android
and iOS]
音源に合った音場効果を楽しむ(サウンドモード)
Enjoy Sound Field Effects that Match the Sound Source (Sound Mode)
本体のサウンドモードを変更する
Change the Sound Mode of the Main Unit
|
サウンドコントロール画面
Sound Control Screen
|
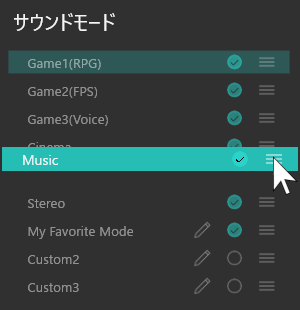
サウンドモードを切り替えることで、接続機器の映像に最適な音場効果をお楽しみいただけます。
また、映像に合わせるだけでなく、音楽のジャンルやその日の気分に合わせて音場効果を自由に調整し、ご自身の好みに合わせたサウンドを楽しむことができます。
初期設定(お買い上げ時)は「RPG」モードです。
また、映像に合わせるだけでなく、音楽のジャンルやその日の気分に合わせて音場効果を自由に調整し、ご自身の好みに合わせたサウンドを楽しむことができます。
初期設定(お買い上げ時)は「RPG」モードです。
By switching the sound mode, you can enjoy sound field effects optimized for the video from your
connected device.
In addition to matching the video, you can freely adjust the sound field effects according to the music genre or your mood, allowing you to enjoy your preferred sound.
The default setting (at the time of purchase) is "RPG" mode.
In addition to matching the video, you can freely adjust the sound field effects according to the music genre or your mood, allowing you to enjoy your preferred sound.
The default setting (at the time of purchase) is "RPG" mode.
[GNW10S-BH]
| Game1 (RPG) |
RPG(ロールプレイングゲーム)に適したモードです。ゲームの世界にいるかのような臨場感と迫力が楽しめます。
This mode is suitable for RPGs (role-playing games). Enjoy the
immersive experience and intensity as if you are in the game's world.
|
| Game2 (Horror) |
ホラーゲームに適したモードです。静寂と衝撃の差を拡大し、ゲーム中の緊張が肌で伝わる恐怖体験を演出します。[GNW10S-BH専用]
This mode is suitable for horror games. It increases the contrast
between quiet moments and sudden loud effects, enhancing in‑game tension.[only
GNW10S-BH]
|
| Game3 (FPS) |
FPS(ファーストパーソンシューティングゲーム)に適したモードです。正確な音の定位が得られ、足音などが聴き取りやすいので、FPS*1やTPS*2などのシューティングゲームに最適です。
*1 FPS:ファーストパーソンシューティングゲーム(First Person Shooter) *2 TPS:サードパーソンシューティングゲーム(Third Person Shooter)
This mode is suitable for FPS (first-person shooter games). Provides accurate sound
positioning, making footsteps and other sounds easy to hear, ideal for FPS*1 and TPS*2
shooting games.
*1 FPS: First Person Shooter *2 TPS: Third Person Shooter |
| Game4 (Voice) |
音声を強調します。人の声が聞き取りやすく、シナリオに没頭できます。
Emphasizes the voice. This mode makes it easier to hear people's
voices and allows you to immerse yourself in the scenario.
|
| Cinema |
映画ならではの立体感や迫力のある音を楽しめます。
You can enjoy the three-dimensional effect and powerful sound
unique
to movies.
|
| Music |
楽器や歌を広がりのある音で楽しめます。
You can enjoy musical instruments and songs with a spacious
sound.
|
| Custom1 |
サウンドモードをカスタムサウンドモードに登録すると、次の項目をカスタマイズできるようになります。
・イコライザー ・名称(アプリ上での表示名) カスタムサウンドモードは最大3つまで登録できます。 (⇒「カスタムサウンドモード」をご覧ください)
By registering a sound mode as a custom sound mode, you can personalize the following
settings:
・Equalizer ・Name (displayed in the app) Up to three custom sound modes can be registered. (See ⇒"Custom Sound Mode") |
| Custom2 | |
| Custom3 |
[GNW10, GNW10S, GNW10S-FF]
[GNW10]
| Game1 (RPG) |
RPG(ロールプレイングゲーム)に適したモードです。ゲームの世界にいるかのような臨場感と迫力が楽しめます。
This mode is suitable for RPGs (role-playing games). Enjoy the
immersive experience and intensity as if you are in the game's world.
|
| Game2 (FPS) |
FPS(ファーストパーソンシューティングゲーム)に適したモードです。正確な音の定位が得られ、足音などが聴き取りやすいので、FPS*1やTPS*2などのシューティングゲームに最適です。
*1 FPS:ファーストパーソンシューティングゲーム(First Person Shooter) *2 TPS:サードパーソンシューティングゲーム(Third Person Shooter)
This mode is suitable for FPS (first-person shooter games). Provides accurate sound
positioning, making footsteps and other sounds easy to hear, ideal for FPS*1 and TPS*2
shooting games.
*1 FPS: First Person Shooter *2 TPS: Third Person Shooter |
| Game3 (Voice) |
音声を強調します。人の声が聞き取りやすく、シナリオに没頭できます。
Emphasizes the voice. This mode makes it easier to hear people's
voices and allows you to immerse yourself in the scenario.
|
| Cinema |
映画ならではの立体感や迫力のある音を楽しめます。
You can enjoy the three-dimensional effect and powerful sound
unique
to movies.
|
| Music |
楽器や歌を広がりのある音で楽しめます。
You can enjoy musical instruments and songs with a spacious sound.
|
| Stereo |
ステレオで出力します。
Outputs in stereo.
|
| Custom1 |
サウンドモードをカスタムサウンドモードに登録すると、次の項目をカスタマイズできるようになります。
・イコライザー ・名称(アプリ上での表示名) カスタムサウンドモードは最大3つまで登録できます。 (⇒「カスタムサウンドモード」をご覧ください)
By registering a sound mode as a custom sound mode, you can personalize the following
settings:
・Equalizer ・Name (displayed in the app) Up to three custom sound modes can be registered. (See ⇒"Custom Sound Mode") |
| Custom2 | |
| Custom3 |
[GNW30]
| Game1 (RPG) |
RPG(ロールプレイングゲーム)に適したモードです。ゲームの世界にいるかのような臨場感と迫力が楽しめます。
This mode is suitable for RPGs (role-playing games). Enjoy the
immersive experience and intensity as if you are in the game's world.
|
| Game2 (FPS) |
FPS(ファーストパーソンシューティングゲーム)に適したモードです。正確な音の定位が得られ、足音などが聴き取りやすいので、FPS*1やTPS*2などのシューティングゲームに最適です。
*1 FPS:ファーストパーソンシューティングゲーム(First Person Shooter) *2 TPS:サードパーソンシューティングゲーム(Third Person Shooter)
This mode is suitable for FPS (first-person shooter games). Provides accurate sound
positioning, making footsteps and other sounds easy to hear, ideal for FPS*1 and TPS*2
shooting games.
*1 FPS: First Person Shooter *2 TPS: Third Person Shooter |
| Game3 (Voice) |
音声を強調します。人の声が聞き取りやすく、シナリオに没頭できます。
Emphasizes the voice. This mode makes it easier to hear people's
voices and allows you to immerse yourself in the scenario.
|
| Cinema |
映画ならではの立体感や迫力のある音を楽しめます。
You can enjoy the three-dimensional effect and powerful sound
unique
to movies.
|
| Music |
楽器や歌を広がりのある音で楽しめます。
You can enjoy musical instruments and songs with a spacious sound.
|
| Stereo |
ステレオで出力します。
Outputs in stereo.
|
| Live |
観客の歓声、アーティストの息づかい、会場全体の熱気までリアルに再現。まるで最前列でライブを体感しているかのような没入感を演出します。[GNW30専用]
Recreates the audience's cheers, the artist's breath, and the
overall
excitement of the venue. Provides an immersive experience as if you were in the front row
at
a live concert. [only GNW30]
|
| Sports |
スタジアムの熱気と興奮をリアルに再現。歓声や実況の臨場感が際立ち、まるでその場で観戦しているかのような迫力のサウンドを楽しめます。[GNW30専用]
Recreates the excitement and thrill of the stadium. Highlights the
presence of cheers and commentary, providing a powerful sound as if you were watching the
event live. [only GNW30]
|
| Anime |
アニメキャラクターのセリフが聞き取りやすく、声優の魅力を堪能でき、バトルシーンでは迫力のあるサウンドを楽しめます。[GNW30専用]
Makes anime characters' dialogue easy to hear, allowing you to
enjoy
the charm of voice actors, and provides powerful sound in battle scenes. [only GNW30]
|
| Custom1 |
サウンドモードをカスタムサウンドモードに登録すると、次の項目をカスタマイズできるようになります。
・イコライザー ・名称(アプリ上での表示名) カスタムサウンドモードは最大3つまで登録できます。 (⇒「カスタムサウンドモード」をご覧ください)
By registering a sound mode as a custom sound mode, you can personalize the following
settings:
・Equalizer ・Name (displayed in the app) Up to three custom sound modes can be registered. (See ⇒"Custom Sound Mode") |
| Custom2 | |
| Custom3 |
サウンドモードを変更する
Change Sound Mode
|
サウンドコントロール画面
Sound Control Screen
|
本体のサウンドモードボタンと同じように、サウンドモードを順番に切り替えることができます。
サウンドモードの切り替え順序はカスタマイズできます。詳細は、以下をご覧ください。
(⇒「本体のサウンドモードボタンをカスタマイズする」)
サウンドモードの切り替え順序はカスタマイズできます。詳細は、以下をご覧ください。
(⇒「本体のサウンドモードボタンをカスタマイズする」)
You can switch the sound mode in order, just like the sound mode button on the main unit.
The switching order of sound modes can be customized. For details, see below.
(⇒"Customize the Switching Order of Sound Modes")
The switching order of sound modes can be customized. For details, see below.
(⇒"Customize the Switching Order of Sound Modes")
カスタムサウンドモード
Custom Sound Mode
|
サウンドコントロール画面
Sound Control Screen
|
サウンドモードをカスタムサウンドモードに登録すると、次の項目をカスタマイズできるようになります。
・イコライザー
・名称(アプリ上での表示名)
本体にはカスタムサウンドモードを最大3つまで登録できます。
アプリにはカスタムサウンドモードを最大10個まで保存できます。保存した中から、使いたい3つを本体に登録して切り替えられます。
・イコライザー
・名称(アプリ上での表示名)
本体にはカスタムサウンドモードを最大3つまで登録できます。
アプリにはカスタムサウンドモードを最大10個まで保存できます。保存した中から、使いたい3つを本体に登録して切り替えられます。
By registering a sound mode as a custom sound mode, you can personalize the following
settings:
・Equalizer
・Name (displayed in the app)
Register up to three custom sound modes on the device.
Save up to ten custom sound modes in the app. From the saved modes, register up to three on the device and switch between them.
・Equalizer
・Name (displayed in the app)
Register up to three custom sound modes on the device.
Save up to ten custom sound modes in the app. From the saved modes, register up to three on the device and switch between them.
[お知らせ]
本体に登録したカスタムサウンドモード(最大3つ)は本体内に保存されます。登録済みのモードは、パソコンやスマートフォン、タブレットがなくても本体のみで呼び出して使用できます。
本体に登録したカスタムサウンドモード(最大3つ)は本体内に保存されます。登録済みのモードは、パソコンやスマートフォン、タブレットがなくても本体のみで呼び出して使用できます。
[Notice]
Custom sound modes registered on the device (up to three) are stored on the device.
Registered modes are available directly on the device; no PC, smartphone, or tablet is required to access or use them.
Custom sound modes registered on the device (up to three) are stored on the device.
Registered modes are available directly on the device; no PC, smartphone, or tablet is required to access or use them.
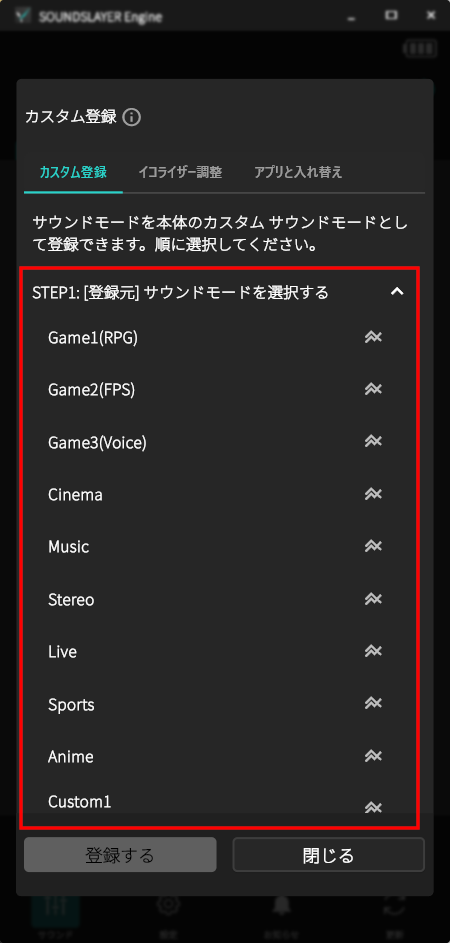
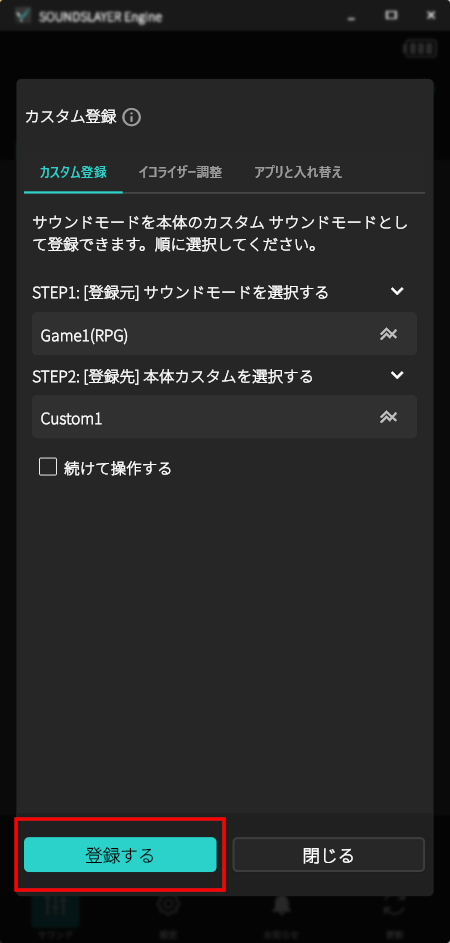
カスタム サウンドモードに登録する
Register to custom sound mode
サウンドモードは、Custom1、Custom2、または Custom3 に登録できます。
You can register a sound mode to Custom1, Custom2, or Custom3.
|
登録手順
Registration Steps
|
|
|
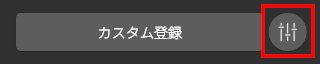
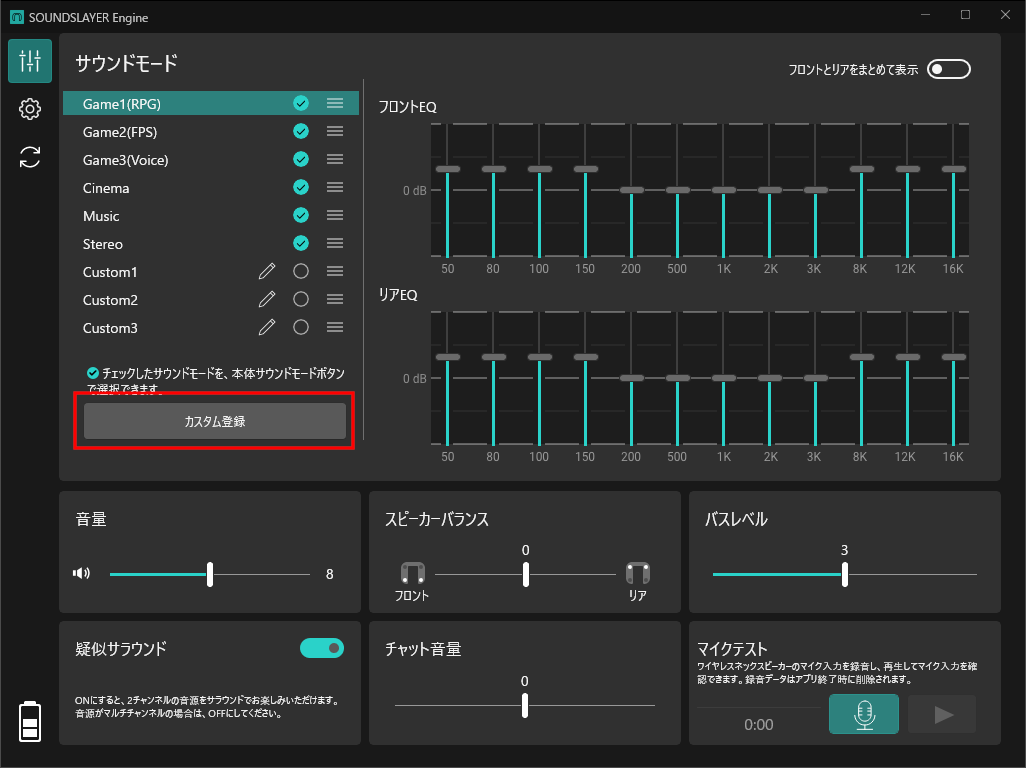
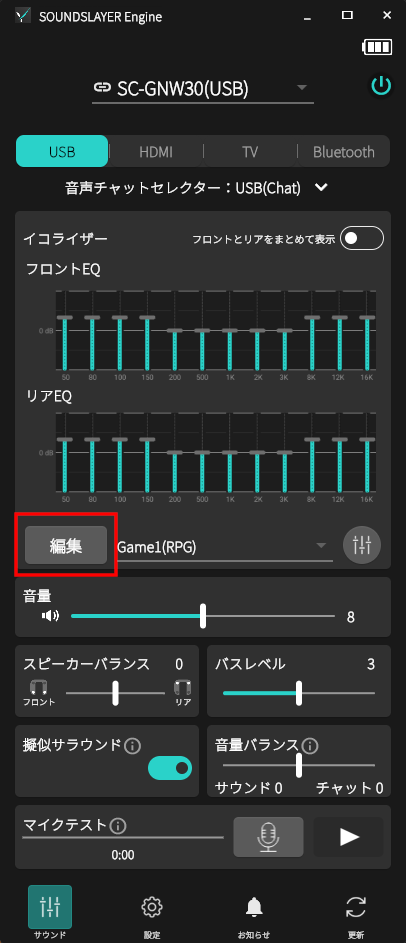
1. カスタム登録ボタンを選択する(スマートフォンの場合は、[編集]→[カスタム登録])
1. Select the "Register Custom" button. (For smartphones, go to
[Edit] → [Register Custom])
|
|
|

|
|
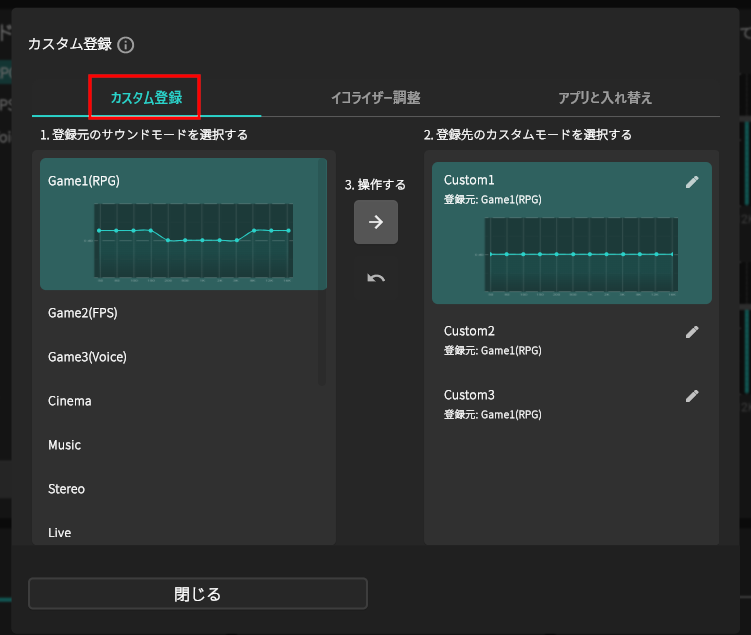
2. カスタム登録タブを選択する
2. Select the "Custom Registration" tab.
|
|
|

|
|
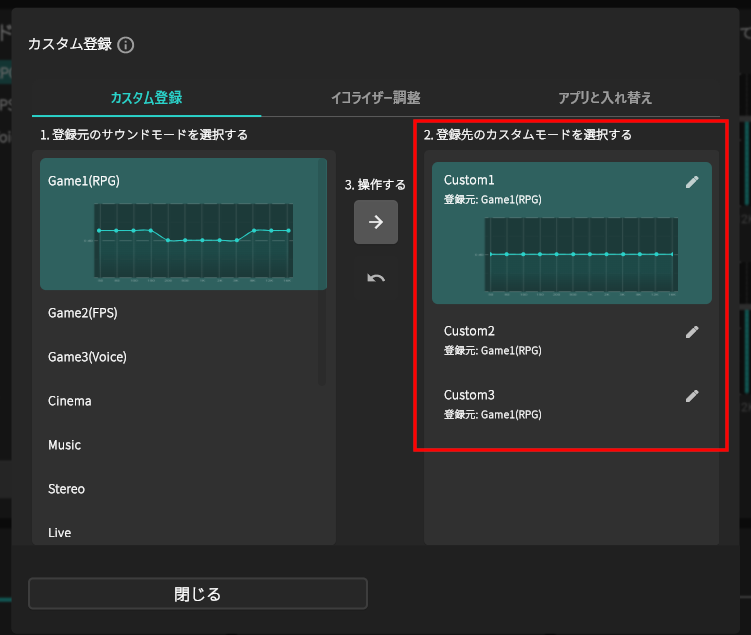
3. 登録元のサウンドモードを選択する
3. Select the sound mode you want to register.
|
|

|
|
|
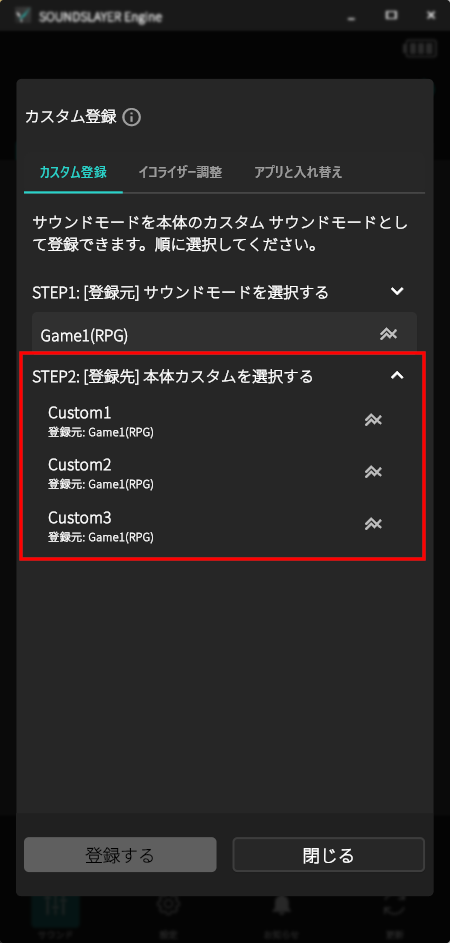
4. 登録先のカスタムモードを選択する
4. Select the custom mode to register to.
|
|
|
|
|
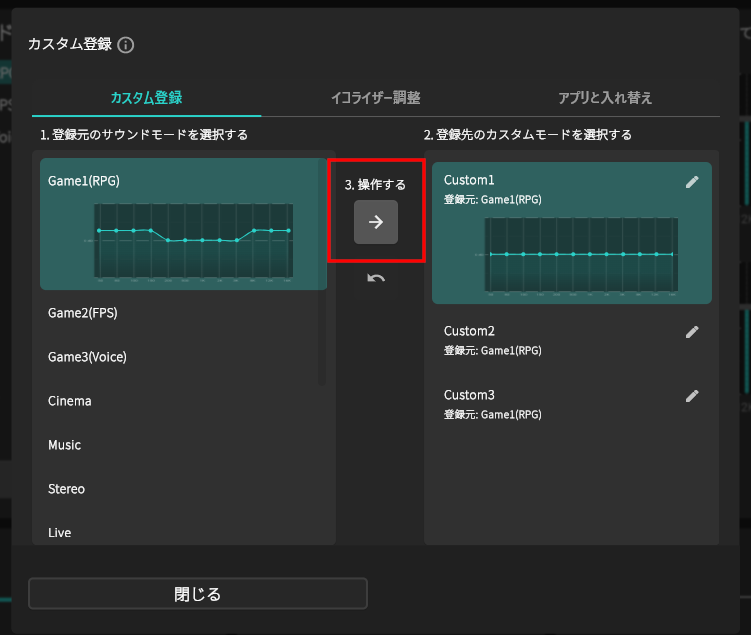
5. 操作するボタンを選択して登録を実行する
5. Select the button to operate and execute the registration.
|
|
|
|
[お知らせ]
イコライザー画面を選択した際、画面下部に表示されるメッセージからもカスタムサウンドモードに登録できます。
イコライザー画面を選択した際、画面下部に表示されるメッセージからもカスタムサウンドモードに登録できます。
[Notice]
You can also register a custom sound mode from the message displayed at the bottom of the screen when you select the equalizer screen.
You can also register a custom sound mode from the message displayed at the bottom of the screen when you select the equalizer screen.
イコライザーを調整する(周波数個別調整)
Adjust the equalizer (individual frequency adjustment)
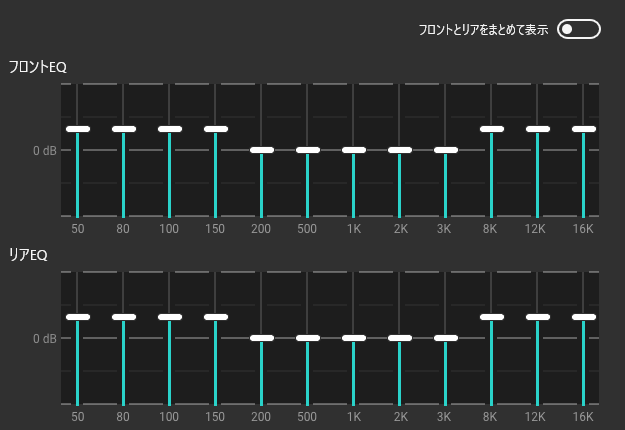
Custom1、Custom2、Custom3に登録したサウンドモードは、それぞれのイコライザー設定をお好みに合わせて調整できます。
For each sound mode registered in Custom1, Custom2, or Custom3, you can adjust the equalizer
settings to your preference.
50Hz、80Hz、100Hz、150Hz、200Hz、500Hz、1KHz、2KHz、3KHz、8KHz、12KHz、16KHzの各周波数を、それぞれ-12から12の範囲で25段階に調整できます。
イコライザーは、フロントスピーカー(前方のスピーカー)とリアスピーカー(後方のスピーカー)で個別に調整できます。
イコライザーの調整は、スライダーをドラッグするか、スライダー横の+/-ボタンを操作して行います。
全バンドをまとめて操作することもできます。次の「イコライザーを調整する(全周波数一括調整)」をご覧ください。
(⇒「イコライザーを調整する(全周波数一括調整)」)
「フロントとリアをまとめて表示」をオンにすると、フロントスピーカーとリアスピーカーを同時に調整することもできます。
(⇒「フロントスピーカーとリアスピーカーをまとめて表示」)
イコライザーは、フロントスピーカー(前方のスピーカー)とリアスピーカー(後方のスピーカー)で個別に調整できます。
イコライザーの調整は、スライダーをドラッグするか、スライダー横の+/-ボタンを操作して行います。
全バンドをまとめて操作することもできます。次の「イコライザーを調整する(全周波数一括調整)」をご覧ください。
(⇒「イコライザーを調整する(全周波数一括調整)」)
「フロントとリアをまとめて表示」をオンにすると、フロントスピーカーとリアスピーカーを同時に調整することもできます。
(⇒「フロントスピーカーとリアスピーカーをまとめて表示」)
Each frequency—50Hz, 80Hz, 100Hz, 150Hz, 200Hz, 500Hz, 1KHz, 2KHz, 3KHz, 8KHz, 12KHz, and
16KHz—can be adjusted in 25 steps from -12 to 12.
The equalizer can be adjusted separately for the front and rear speakers.
You can adjust the equalizer by dragging the sliders or using the +/- buttons next to the sliders.
You can also operate all bands together. See the following "Adjust the equalizer (overall band adjustment)".
(⇒"Adjust the equalizer (overall band adjustment)")
By turning on "Show front and rear together", you can also adjust both the front and rear speakers at the same time.
(⇒「Display Front Speakers and Rear Speakers Together」)
イコライザー調整画面を拡大表示する [Android・iOSのスマートフォン専用]
Enlarge the equalizer adjustment screen [only Android
and iOS smartphones]
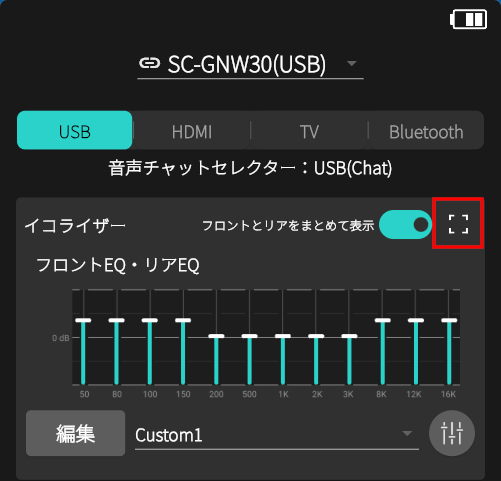
AndroidやiOSのスマートフォンでは、 アイコンを選択すると、イコライザー画面が拡大表示され、スマートフォンの画面でも細かな調整ができるようになります。
スマートフォンを横向きにして操作してください。
元の画面に戻るには、 アイコンを選択してください。
スマートフォンを横向きにして操作してください。
元の画面に戻るには、
On Android and iOS smartphones, selecting the
icon
enlarges the equalizer screen, allowing for finer adjustments even on a
smartphone screen.
Please operate the smartphone in landscape orientation.
To return to the original screen, select theicon.
Please operate the smartphone in landscape orientation.
To return to the original screen, select the


イコライザーを調整する(全周波数一括調整)
Adjust the equalizer (overall band adjustment)
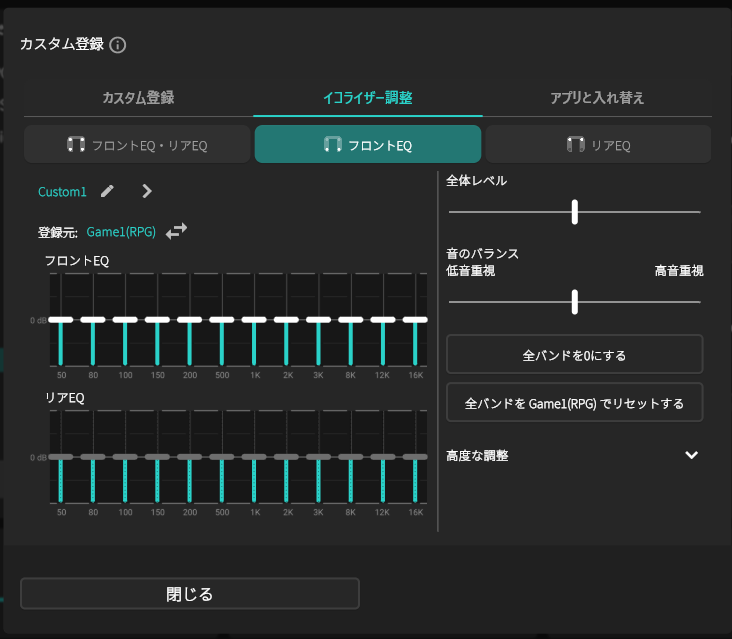
周波数全体を一括で調整できます。
You can adjust the entire frequency range all at once.
|
全体レベル
Overall Level
|
全体のレベルをスライダーで一括で上下できます。
You can raise or lower the overall level all at once using a
slider.
|
|
音のバランス
Tonal balance
|
全体のトーンバランスをスライダーで低音寄り/高音寄りに傾けて調整できます。
You can use a slider to adjust the overall tonal balance toward
more bass or more treble.
|
|
全バンドを0にする
Set all bands to 0 dB
|
全周波数の設定を一括で0dBにできます。
You can set all frequency settings to 0 dB at once.
|
|
全バンドリセットする
Reset all bands
|
登録元の設定にリセットできます。
You can reset to the settings of the registration source.
|
|
高度な調整
Advanced adjustments
|
高域・中域・低域をそれぞれ専用のスライダーで細かく調整できます。
You can fine-tune the high, mid, and low ranges using dedicated
sliders for each.
|
カスタム登録をアプリと入れ替える
Swap custom registration with the app
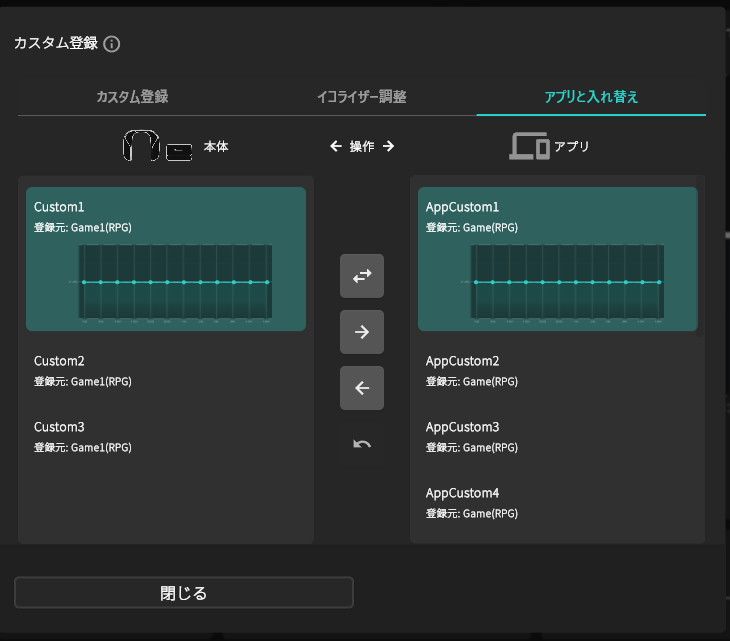
カスタム登録画面のアプリと入れ替えるでは本体に保存されたカスタム設定と、アプリ側に保存されたカスタム設定を相互にコピー・入れ替えできます。
On the Custom Registration screen's "Swap with App" feature, you can copy and swap custom
settings stored on the device with those saved in the app.
基本操作
コピー(本体 → アプリ)
1.左側の本体項目を選択
2.右側のアプリ項目(保存先)を選択
3.中央のアプリにコピーボタン(右矢印)を押す
コピー(アプリ → 本体)
1.右側のアプリ項目を選択
2.左側の本体スロットを選択
3.中央の機器にコピーボタン(左矢印)を押す
入れ替え
1.左右でそれぞれ対象項目を選択
2.中央の左右を入れ替えるボタンを押す
取り消し
誤って操作した場合は「元に戻す」ボタンを押す
コピー(本体 → アプリ)
1.左側の本体項目を選択
2.右側のアプリ項目(保存先)を選択
3.中央のアプリにコピーボタン(右矢印)を押す
コピー(アプリ → 本体)
1.右側のアプリ項目を選択
2.左側の本体スロットを選択
3.中央の機器にコピーボタン(左矢印)を押す
入れ替え
1.左右でそれぞれ対象項目を選択
2.中央の左右を入れ替えるボタンを押す
取り消し
誤って操作した場合は「元に戻す」ボタンを押す
Basic operation
Copy (Device → App)
1. Select the item on the device (left).
2. Select the app item (right) as the destination.
3. Press the copy-to-app button (right arrow) in the center.
Copy (App → Device)
1. Select the app item (right).
2. Select the device slot (left) as the destination.
3. Press the copy-to-device button (left arrow) in the center.
Swap
1. Select the target items on the left and right.
2. Press the swap button in the center.
Undo
If you made a mistake, press the "Undo" button.
名称を変更する
Change name
|
1. 名称変更したいカスタム サウンドモードのアイコン
1. Select the icon
|

|
|
2. 名称を入力して、[決定]ボタンを選択する。
2. Enter the name and select the [Confirm] button.
|

|
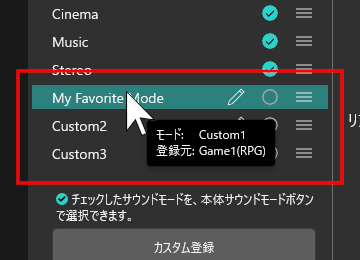
登録元を確認する
Check the registration source
カスタムサウンドモードにマウスカーソルを合わせると、そのモードがCustom1・Custom2・Custom3のどれに該当するかと、登録元のサウンドモード名がポップアップで表示されます。
スマートフォン・タブレットの場合は、カスタムサウンドモードを長押ししてください。
When you hover the mouse cursor over a custom sound mode, a popup will display which of
Custom1, Custom2, or Custom3 it corresponds to, along with the name of the source sound
mode.
For smartphones and tablets, please long-press the custom sound mode.

|
|
本体のサウンドモードボタンをカスタマイズする
Customize the behavior of the main unit sound mode button
|
サウンドコントロール画面
Sound Control Screen
|
本体のサウンドモードボタンを押した際のサウンドモードの切り替え順序をカスタマイズできます。
カスタマイズでは、切り替えるモードの有効/無効の設定や、切り替え順序の変更ができます。
カスタマイズでは、切り替えるモードの有効/無効の設定や、切り替え順序の変更ができます。
You can customize the switching order of sound modes when you press the sound mode button on
the main unit.
In customization, you can set the enabled/disabled status of the modes to be switched and change the switching order.
In customization, you can set the enabled/disabled status of the modes to be switched and change the switching order.
[お知らせ]
サウンドモードの切り替え順序は は本体に保存されます。一度登録すれば、パソコンやスマートフォン、タブレットがなくても、登録した切り替え順序で使用することができます。
サウンドモードの切り替え順序は は本体に保存されます。一度登録すれば、パソコンやスマートフォン、タブレットがなくても、登録した切り替え順序で使用することができます。
[Notice]
The switching order of sound modes is saved in the main unit. Once registered, you can use the registered switching order without needing a PC, smartphone, or tablet.
The switching order of sound modes is saved in the main unit. Once registered, you can use the registered switching order without needing a PC, smartphone, or tablet.
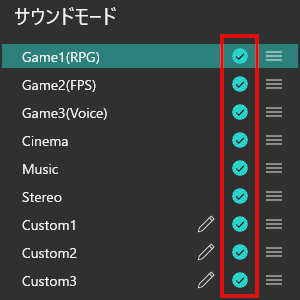
モードの有効/無効の設定を変更する
Change the enabled/disabled settings of modes
変更したいサウンドモードの アイコンを選択します。
アイコンを選択します。
Select the icon of the
sound mode you want to change.
icon of the
sound mode you want to change.
 |
有効
Enable
|
本体のサウンドモードボタンで順番に切り替える際に選択されます。
This mode will be included when switching sound modes in order
using the main unit's sound mode button.
|
 |
無効
Disable
|
本体のサウンドモードボタンで順番に切り替える際にスキップされます。
無効に設定されていても、本アプリで直接サウンドモードを選択すればモードを使用することができます。
This mode will be skipped when switching sound modes in order using the main unit's
sound mode button.
Even if set to disabled, you can still use the mode by selecting it directly in this app. |
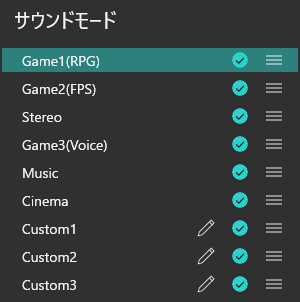
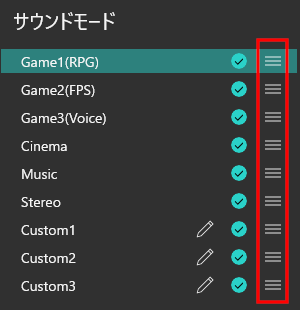
切り替え順序を変更する
Change Sound Mode Order
本体のサウンドモードボタンを押したときに切り替わるサウンドモードの順番を変更できます。
You can change the order of sound modes that switch when you press the sound mode button on
the main unit.
並び順を変更したいサウンドモードの アイコンをドラッグすると移動できます。移動先で指やマウスを離してください。
アイコンをドラッグすると移動できます。移動先で指やマウスを離してください。
You can move the sound mode whose order you want to change by dragging the
icon. Release your finger or mouse
at the destination.
icon. Release your finger or mouse
at the destination.
 |
 |
その他の便利な機能
Other useful features
セレクターを切り替える [GNW30専用]
Switch Selector [only GNW30]

|
サウンドコントロール画面
Sound Control Screen
|
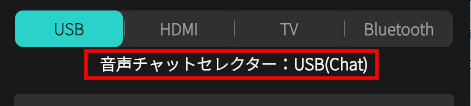
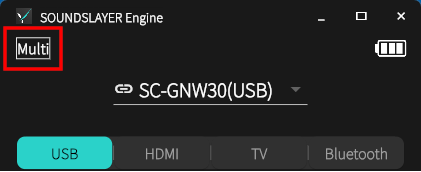
本体の現在のセレクター(入力切替)を表示します。
また、USB、HDMI、TV、Bluetoothの4つのセレクターに切り替えることができます。
また、USB、HDMI、TV、Bluetoothの4つのセレクターに切り替えることができます。
The app displays the current selector (input source) of the main unit.
You can also switch between four selectors: USB, HDMI, TV, and Bluetooth.
You can also switch between four selectors: USB, HDMI, TV, and Bluetooth.
音声チャットセレクターを変更する [GNW30専用]
Change Audio Chat Selector [only GNW30]
|
サウンドコントロール画面
Sound Control Screen
|
音声チャットとして選択しているセレクターを表示します。
Displays the selector chosen for voice chat.
| Bluetooth |
Bluetooth接続で音声チャットができます。
You can use voice chat via Bluetooth connection.
|
| USB(Chat) |
USB(Chat)接続で音声チャットができます。
You can use voice chat via USB (Chat) connection.
|
・BluetoothとUSB(Chat)は同時に音声チャットで使用することはできません。
・USBとBluetoothの両方が接続されている場合は、設定画面で選択した「優先音声チャットセレクター」に従って自動的に切り替わります。
・USBまたはBluetoothのどちらか一方のみ接続されている場合は、そのセレクターが自動的に選択されます。
・USBとBluetoothの両方が接続されている場合は、設定画面で選択した「優先音声チャットセレクター」に従って自動的に切り替わります。
・USBまたはBluetoothのどちらか一方のみ接続されている場合は、そのセレクターが自動的に選択されます。
・Bluetooth and USB (Chat) cannot be used for voice chat at the same time.
・If both USB and Bluetooth are connected, the selection will automatically follow the "Preferred Voice Chat Selector" set in the settings screen.
・If only one of USB or Bluetooth is connected, the connected selector will be selected automatically.
・If both USB and Bluetooth are connected, the selection will automatically follow the "Preferred Voice Chat Selector" set in the settings screen.
・If only one of USB or Bluetooth is connected, the connected selector will be selected automatically.
|
折りたたみボタンを選択すると音声チャットセレクターの経路をイラスト表示します。
Selecting the collapse button displays the voice chat selector’s
routing path as an illustration.
|
音量を調整する
Adjust Volume
|
サウンドコントロール画面
Sound Control Screen
|
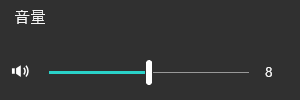
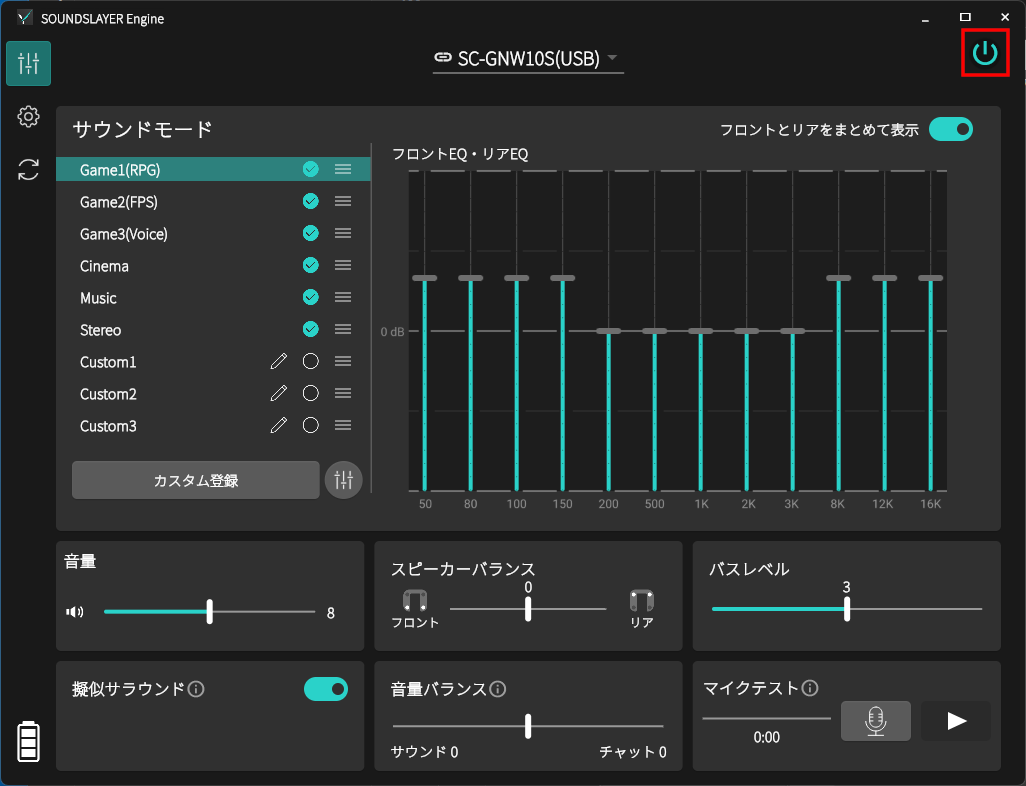
「音量」のスライダーで本体の音量を調整できます。
音量は、0から16までの17段階で選択できます。
音量は、0から16までの17段階で選択できます。
音量設定は、USB、HDMI、TV、Bluetoothの各セレクターごとに本体に個別に記憶されます。[GNW30専用]
You can adjust the volume of the main unit using the "Volume" slider.
The volume can be set in 17 levels, from 0 to 16.
The volume can be set in 17 levels, from 0 to 16.
Volume settings are individually stored in the main unit for each selector: USB, HDMI, TV,
and Bluetooth. [only GNW30]
バランスを調整する
Adjust Balance
|
サウンドコントロール画面
Sound Control Screen
|
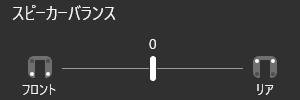
本体のフロントスピーカーとリアスピーカーのバランスを調整できます。
バランスは「フロントスピーカー側 +1~+3」「中央」「リアスピーカー側 +1~+3」の7段階から選べます。
初期設定(お買い上げ時)は中央(0)です。
バランスは「フロントスピーカー側 +1~+3」「中央」「リアスピーカー側 +1~+3」の7段階から選べます。
初期設定(お買い上げ時)は中央(0)です。
You can adjust the balance between the front and rear speakers of the main unit.
There are 7 selectable levels: +1 to +3 toward the front speakers, center, and +1 to +3 toward the rear speakers.
The default setting at the time of purchase is center (0).
There are 7 selectable levels: +1 to +3 toward the front speakers, center, and +1 to +3 toward the rear speakers.
The default setting at the time of purchase is center (0).
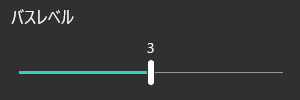
バスレベルを変更する
Change Bass Level
|
サウンドコントロール画面
Sound Control Screen
|
本体のバスレベル(低音の強さ)を調整できます。
バスレベルは1から5までの5段階から選べます。
初期設定(お買い上げ時)は「3」です。
バスレベルは1から5までの5段階から選べます。
初期設定(お買い上げ時)は「3」です。
You can adjust the bass level (strength of low tones) of the main unit.
The bass level can be set to 5 levels, from 1 to 5.
The default setting at the time of purchase is "3".
The bass level can be set to 5 levels, from 1 to 5.
The default setting at the time of purchase is "3".
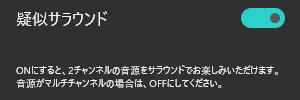
疑似サラウンドの設定を変更する
Change Virtual Surround Settings
|
サウンドコントロール画面
Sound Control Screen
|
本体の疑似サラウンド機能(複数のスピーカーで立体的な音場を再現する機能)のオン/オフを切り替えることができます。
MusicモードやStereoモード時は、リア(L/R)スピーカーからもフロント(L/R)スピーカーと同じ音声が再生されます。
音源がマルチチャンネルの場合は、音源をより正確に再生するために疑似サラウンド機能をオフにしてください。
MusicモードやStereoモード時は、リア(L/R)スピーカーからもフロント(L/R)スピーカーと同じ音声が再生されます。
音源がマルチチャンネルの場合は、音源をより正確に再生するために疑似サラウンド機能をオフにしてください。
音源のチャンネル数については、以下をご覧ください。
(⇒「音源のチャンネル数を確認する [GNW10S-BH, GNW10S-FF, GNW30, GNW10S 専用]」)
(⇒「音源のチャンネル数を確認する [GNW10S-BH, GNW10S-FF, GNW30, GNW10S 専用]」)
You can toggle the virtual surround function of the main unit (a function that reproduces a
three-dimensional sound field with multiple speakers) on and off.
In Music mode and Stereo mode, the same audio is played from both the front (L/R) and rear (L/R) speakers.
For multi-channel audio sources, please turn off the virtual surround function to reproduce the source more accurately.
In Music mode and Stereo mode, the same audio is played from both the front (L/R) and rear (L/R) speakers.
For multi-channel audio sources, please turn off the virtual surround function to reproduce the source more accurately.
For information on the number of channels in the audio source, please refer to the
following.
(⇒ "Check the number of channels in the audio source [only GNW30]")
(⇒ "Check the number of channels in the audio source [only GNW30]")
 |
ON |
2チャンネル音源をサラウンドに拡張して再生します。
※初期設定(お買い上げ時の状態)です。
Expands 2-channel audio sources to surround sound for playback.
*This is the default (factory) setting. |
 |
OFF |
マルチチャンネル音源を4つのスピーカーでそのまま再生します。
Plays multi-channel audio sources faithfully through all four speakers.
|
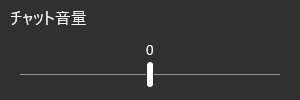
チャット音量を調整する [GNW10専用]
Adjust chat volume [only GNW10]
|
サウンドコントロール画面
Sound Control Screen
|
チャット通話中、相手の声の音量を調整できます。
音量は-3から+3までの7段階で設定できます。
初期設定(お買い上げ時)は0です。
音量は-3から+3までの7段階で設定できます。
初期設定(お買い上げ時)は0です。
SC-GNW10S, SC-GNW10S-FF, SC-GNW10S-BH およびSC-GNW30では、音量バランス機能で調整できます。
(⇒「音量バランスを調整する [GNW10S-BH, GNW10S-FF, GNW30, GNW10S 専用]」)
(⇒「音量バランスを調整する [GNW10S-BH, GNW10S-FF, GNW30, GNW10S 専用]」)
During a chat call, you can adjust the volume of the other person's voice.
The volume can be set in 7 levels, from -3 to +3.
The default setting (at the time of purchase) is 0.
The volume can be set in 7 levels, from -3 to +3.
The default setting (at the time of purchase) is 0.
For the SC-GNW30, you can adjust it using
the volume balance function.
(⇒ "Adjust chat volume [only GNW30]")
(⇒ "Adjust chat volume [only GNW30]")
|
サウンドコントロール画面
Sound Control Screen
|
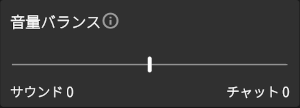
音声チャット中は、相手の声と音楽の音量バランスを自由に調整できます。
チャット音量とスピーカー音量のバランスをお好みに合わせて変更できます。
ネックスピーカーの電源を切ったり、セレクターを切り替えると、設定は初期値に戻ります。
初期設定(お買い上げ時)は0です。
チャット音量・スピーカー音量は、それぞれ0から-5まで調整できます。
一時的にチャット音量を下げたい場合は、0から-5の範囲で調整してください。チャット音量を-5(最小)にすると、スピーカー音量はそのままでチャット音声が聞こえなくなり、スピーカー音のみとなります。
音声チャットに集中したい場合は、チャット音量はそのままにしてスピーカー音量のみを調整できます。スピーカー音量を-5にすると、スピーカーからの音が聞こえなくなり、チャット音声のみとなります。
During a voice chat, you can freely adjust the balance between the other person's voice
and
music.
You can set the balance between chat volume and speaker volume to your preference.
If you turn off the neck speaker or switch the selector, the settings will return to their default values.
The default setting (at the time of purchase) is 0.
Both chat volume and speaker volume can be adjusted from 0 to -5.
If you want to temporarily lower the chat volume, adjust it between 0 and -5. Setting the chat volume to -5 (minimum) will mute the chat audio while keeping the speaker volume unchanged.
If you want to focus on voice chat, you can leave the chat volume as is and adjust only the speaker volume. Setting the speaker volume to -5 will mute the speaker sound, leaving only the chat audio.
ネックスピーカーのマイク入力を確認する
Check the microphone input of the neck speaker
|
サウンドコントロール画面
Sound Control Screen
|
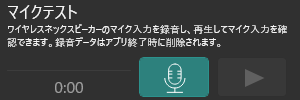
ネックスピーカーのマイク入力を録音し、再生して音声が正しく入力されているか確認できます。
You can record the microphone input of the neck speaker and play it back to check
if
your voice is being captured correctly.
|
マイク入力の録音を開始します。最大10秒間録音できます。
ボタンを押すとすぐに録音が始まります。
Starts recording the microphone input. You can record for up to 10 seconds.
Recording will begin immediately when you press the button. |
|
|
録音したマイク入力の音声を再生します。
Plays the recorded microphone input audio.
|
|
|
録音/再生を停止します。
Stop recording/playback.
|
録音データはアプリを終了すると自動的に削除されます。
Recorded data will be automatically deleted when you close the app.
音源のチャンネル数を確認する [GNW10S-BH, GNW10S-FF, GNW30, GNW10S 専用]
Check the number of channels in the audio source [only
GNW30]
|
サウンドコントロール画面
Sound Control Screen
|

標準レイアウト
Standard Layout
|
縦向きレイアウト
Portrait Layout
|
音源のチャンネル数を確認できます。
チャンネル数が判別できない場合は、表示されません。
チャンネル数が判別できない場合は、表示されません。
You can check the number of audio channels.
If the number of channels cannot be determined, nothing will be displayed.
If the number of channels cannot be determined, nothing will be displayed.
 |
音源が2チャンネルの場合に表示されます。
Displayed when the audio source is 2 channels.
|
 |
Displayed when the audio source is multi-channel.
By turning off virtual surround, you can play the audio source more accurately. (⇒ "Change Virtual Surround Settings") |
フロントスピーカーとリアスピーカーのイコライザーをまとめて表示・調整する
Displaying and adjusting equalizers for front and rear speakers at
once
|
サウンドコントロール画面
Sound Control Screen
|
「フロントとリアをまとめて表示」をオンにすると、フロントスピーカーとリアスピーカーのイコライザーを同時に表示・調整できます。
イコライザーの調整は、カスタムサウンドモード(Custom1/2/3)でのみ行えます。
イコライザーの調整は、カスタムサウンドモード(Custom1/2/3)でのみ行えます。
When "Show front and rear together" is turned on, you can display and adjust the
equalizers
for both the front and rear speakers at the same time.
The equalizer can be adjusted only in custom sound modes (Custom1/2/3).
The equalizer can be adjusted only in custom sound modes (Custom1/2/3).
|
ON |
フロントスピーカーとリアスピーカーのイコライザーをまとめて表示/調整
※アプリの初期値 Display/adjust front and rear speaker equalizers at
once
This is the default value of the app. 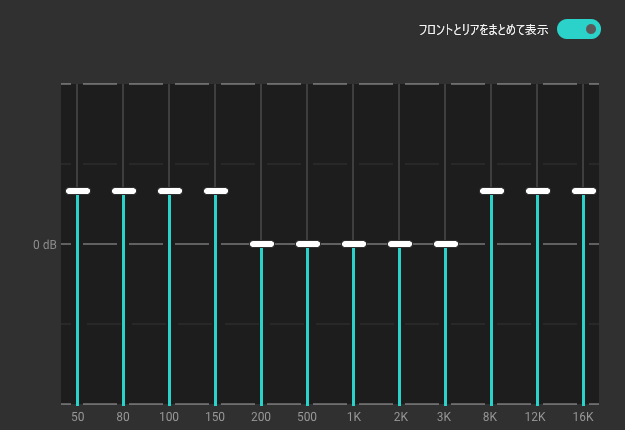
|
|
OFF |
フロントスピーカーとリアスピーカーのイコライザーを分けて表示/調整
Display/adjust the equalizer for front and rear speakers
separately
|
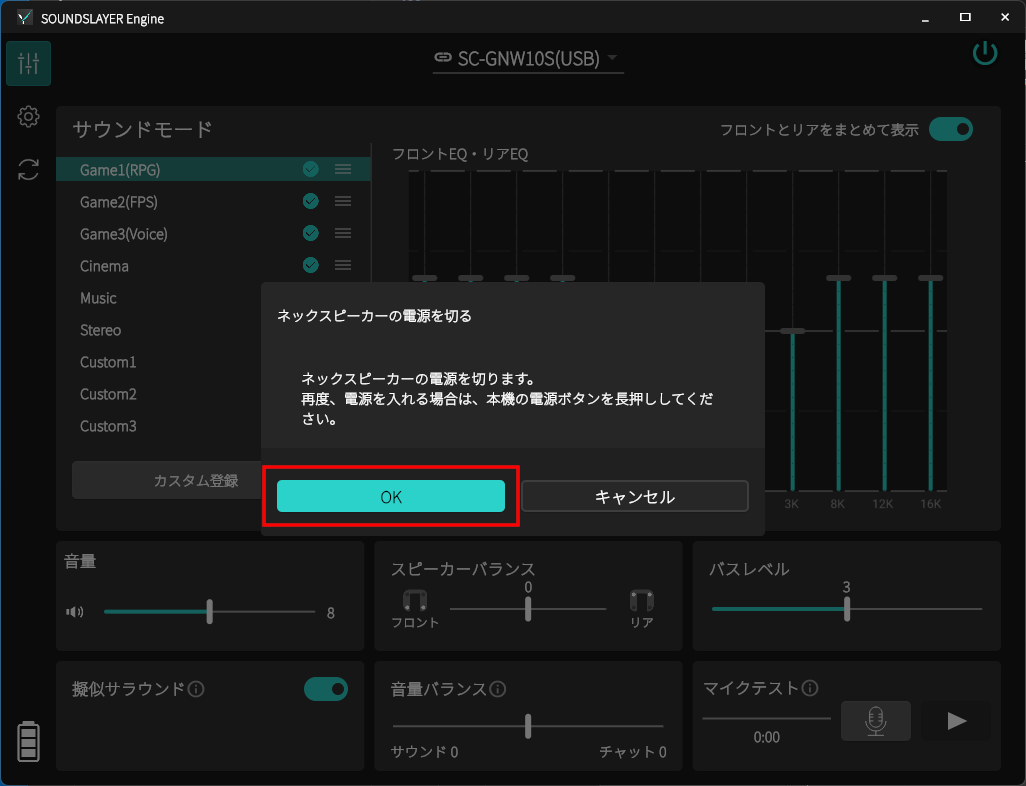
ネックスピーカーの電源を切る
Turn off the neck speaker
|
サウンドコントロール画面
Sound Control Screen
|
電源アイコン を選択します。表示される確認画面でOKを選択すると、ネックスピーカーの電源が切れます。
Select the Power icon . In the confirmation
screen that appears, select OK to turn off the
neck speaker.
|
1. 電源アイコンを選択する
1. You select the Power icon
|
|
|
2. OKを選択する
2. Select OK to turn off the neck speaker.
|
|
操作する機器を確認する/選択する
Confirm/Select the Device to Operate

|
サウンドコントロール画面
Sound Control Screen
|
|
|
設定管理画面
Settings Management Screen
|
現在操作中の機器が表示されます。
別の機器を操作したい場合は、このボタンを選択し、表示されるリストから機器を選んでください。
別の機器を操作したい場合は、このボタンを選択し、表示されるリストから機器を選んでください。
The device you are currently operating is displayed.
To operate a different device, select this button and choose the desired device from the list.
To operate a different device, select this button and choose the desired device from the list.
送信機とUSB接続している場合(Windows・macOS)は「(USB)」と表示されます。
送信機とBluetooth(BLE)接続している場合(Android・iOS)は「(xx:xx:xx:xx:xx:xx)」またはBluetooth機器名が表示されます。
※「xx:xx:xx:xx:xx:xx」には送信機のBluetoothアドレスが表示されます。
※「xx:xx:xx:xx:xx:xx」には送信機のBluetoothアドレスが表示されます。
When connected to the transmitter via USB (Windows and macOS versions), "(USB)" will be
displayed.
When connected to the transmitter via Bluetooth (BLE) (Android and iOS versions), either
"(xx:xx:xx:xx:xx:xx)" or the Bluetooth device name will be displayed.
* "xx:xx:xx:xx:xx:xx" represents the Bluetooth address of the transmitter.
* "xx:xx:xx:xx:xx:xx" represents the Bluetooth address of the transmitter.
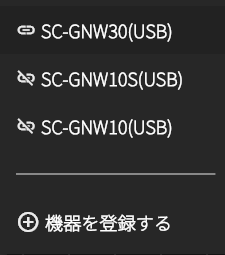
 |
送信機と接続されています。
Connected to the transmitter.
|
 |
送信機と接続されていません。
Not connected to the transmitter.
|
新しいファームウェアのお知らせの確認/ファームウェアを更新する
Check for New Firmware Notifications / Update Firmware
|
サウンドコントロール画面
Sound Control Screen
|
|
|
設定管理画面
Settings Management Screen
|

新しいファームウェアが公開されると、アプリ画面に「新しいファームウェアがあります」というボタンが表示されます。
ボタンを選択すると、ファームウェアのダウンロード画面に移動しますので、画面の案内に従って操作してください。
新しいファームウェアの自動検出機能を利用するには、プライバシーポリシーへの同意が必要です。
(⇒「プライバシーポリシーを確認・同意/非同意を設定する」)
ボタンを選択すると、ファームウェアのダウンロード画面に移動しますので、画面の案内に従って操作してください。
新しいファームウェアの自動検出機能を利用するには、プライバシーポリシーへの同意が必要です。
(⇒「プライバシーポリシーを確認・同意/非同意を設定する」)
When new firmware is released, a button labeled "New firmware is available" will appear on
the
app screen.
By selecting this button, you will be taken to the firmware download screen. Please follow the on-screen instructions.
To use the automatic firmware detection feature, you must agree to the privacy policy.
(⇒ "Check/Set Agreement or Disagreement with Privacy Policy")
By selecting this button, you will be taken to the firmware download screen. Please follow the on-screen instructions.
To use the automatic firmware detection feature, you must agree to the privacy policy.
(⇒ "Check/Set Agreement or Disagreement with Privacy Policy")
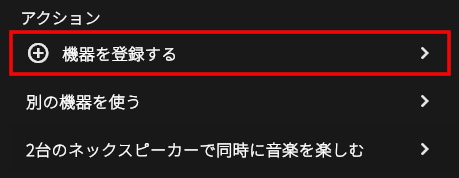
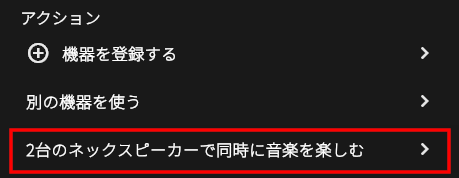
機器を登録する
Register Device
|
設定管理画面 > アクション
Settings Management Screen > Action
|
本アプリで機器を使用するためには、機器の登録が必要です。
登録手順はアプリ内で画面の案内に従って進めてください。
登録手順はアプリ内で画面の案内に従って進めてください。
To use a device with this app, you need to register it.
The app will guide you through the registration process on screen.
The app will guide you through the registration process on screen.
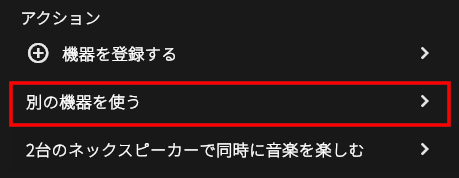
別の機器を使う
Use Another Device
|
設定管理画面 > アクション
Settings Management Screen > Action
|
2台以上のSOUNDSLAYERをお持ちの場合、操作したい機器を切り替えることができます。
If you have two or more SOUNDSLAYER units, you can switch between the devices you want to
control.
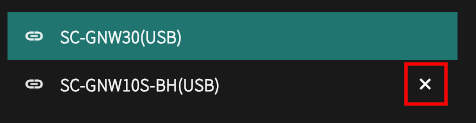
|
機器リストの右端のアイコン
By selecting the icon on the far right of the device list
|
2台のネックスピーカーで同時に音楽を楽しむ
Enjoy Music on Two Neck Speakers Simultaneously
|
設定管理画面 > アクション
Settings Management Screen > Action
|
2台以上のSOUNDSLAYERをお持ちの場合、2台のネックスピーカーで同じ音楽を同時に楽しめます。アプリの案内に従って、簡単に設定できます。
※SC-GNW10をご利用の場合、ファームウェアのバージョンによっては本機能がご利用いただけない場合があります。ご利用の際は、送信機およびネックスピーカーのファームウェアを最新バージョンに更新してください。
【ご注意】
2台のネックスピーカーで同時に音楽を再生する場合、音量やサウンドモードの設定は、最初に電源を入れた1台目(メイン)のネックスピーカーで行った内容が2台目にも反映されます。2台目のネックスピーカーは個別に操作できません(操作しようとすると操作音が鳴ります)。どちらが1台目(メイン)になるかは、電源を入れた順番で決まります。1台目(メイン)の電源が切れると、2台目が新たなメインとして認識されます。
どのネックスピーカーがメインとして認識されているかは、アプリ画面で確認できます。詳しくは下記をご覧ください。
(「ネックスピーカーの本体を見分ける」)
If you have two or more SOUNDSLAYER units, you can enjoy the same music on two neck
speakers at
the same time. Simply follow the instructions in the app for easy setup.
*For SC-GNW10, this feature may not be available depending on the firmware version. Please update both the transmitter and neck speaker to the latest firmware before use.
[Note]
When playing music on two neck speakers simultaneously, the volume and sound mode settings made on the first (main) neck speaker powered on will also be applied to the second neck speaker. The second neck speaker cannot be operated individually (an operation sound will play if you attempt to operate it). Which neck speaker becomes the main unit is determined by the order in which the power is turned on. When the main unit is powered off, the second neck speaker will be recognized as the new main unit.
You can check which neck speaker is recognized as the main device on the app screen. For details, please see below.
("Identify the Neck Speaker")
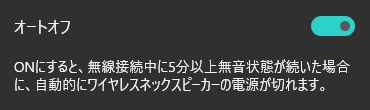
オートオフ設定を変更する
Change Auto-Off Settings
|
設定管理画面
Settings Management Screen
|
送信機とネックスピーカーが無線接続されている場合のオートオフ動作を変更できます。
なお、この設定に関わらず、送信機とネックスピーカーの無線接続が5分以上切断されたままの場合は、電池残量を節約するため自動的に電源が切れます。
なお、この設定に関わらず、送信機とネックスピーカーの無線接続が5分以上切断されたままの場合は、電池残量を節約するため自動的に電源が切れます。
You can change the auto-off behavior when the transmitter and neck speaker are wirelessly
connected.
Regardless of this setting, if the wireless connection between the transmitter and neck speaker is lost for more than 5 minutes, the power will turn off automatically to save battery.
Regardless of this setting, if the wireless connection between the transmitter and neck speaker is lost for more than 5 minutes, the power will turn off automatically to save battery.
[GNW10S-BH, GNW10S-FF, GNW10S, GNW10]
[GNW10]
|
ON |
無線接続中に5分以上無音状態が続くと、自動的にネックスピーカーの電源が切れます。
※お買い上げ時の設定です。
If there is no sound for more than 5 minutes during a wireless connection, the
wireless
neck speaker will automatically turn off.
*This is the factory default setting. |
|
OFF |
自動的に電源は切れません。
※ただし、送信機との無線接続が切断された状態が5分以上続くと、電池残量を節約するため自動的に電源が切れます。
The power will not turn off automatically.
*However, if the wireless connection with the transmitter is lost for more than 5 minutes, the power will turn off automatically to save battery. |
[GNW30]
| OFF |
自動的に電源は切れません。
※ただし、送信機との無線接続が切断された状態が5分以上続くと、電池残量を節約するため自動的に電源が切れます。
The power will not turn off automatically.
*However, if the wireless connection with the transmitter is lost for more than 5 minutes, the power will turn off automatically to save battery. |
|
ON(5分)
ON(5 min)
|
無線接続中に5分以上無音状態が続くと、自動的にネックスピーカーの電源が切れます。
※お買い上げ時の設定です。
If there is no sound for more than 5 minutes during a wireless connection, the
wireless
neck speaker will automatically turn off.
*This is the factory default setting. |
|
ON(10分)
ON(10 min)
|
無線接続中に10分以上無音状態が続くと、自動的にネックスピーカーの電源が切れます。
If there is no sound for more than 10 minutes during a wireless connection, the
wireless
neck speaker will automatically
|
|
ON(15分)
ON(15 min)
|
無線接続中に15分以上無音状態が続くと、自動的にネックスピーカーの電源が切れます。
If there is no sound for more than 15 minutes during a wireless connection, the
wireless
neck speaker will automatically turn off.
|
|
ON(20分)
ON(20 min)
|
無線接続中に20分以上無音状態が続くと、自動的にネックスピーカーの電源が切れます。
If there is no sound for more than 20 minutes during a wireless connection, the
wireless
neck speaker will automatically turn off.
|
ライティング設定を変更する
Change lighting settings

|
設定管理画面 > システム
Settings Management Screen > System
|
送信機とネックスピーカーが無線接続されている場合のネックスピーカーの動作ランプの表示設定を変更できます。
You can change the display settings of the neck speaker's operation lamp when the
transmitter and neck speaker are wirelessly connected.
|
ON |
ネックスピーカーの動作ランプを点灯します。
※お買い上げ時の設定 You can turn on the operation lamp of the neck speaker
while it is connected wirelessly.
*This is the default setting at the time of purchase. |
|
OFF |
ネックスピーカーの動作ランプを消灯します。
You can turn off the operation lamp of the neck speaker.
|
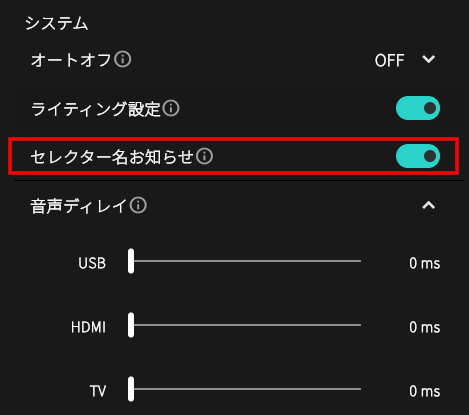
セレクター名お知らせ設定を変更する [GNW30専用]
Announce Selector Name [only GNW30]
|
設定管理画面 > システム
Settings Management Screen > System
|
ネックスピーカーの電源を入れると、現在のセレクター(入力切替)位置を音声でお知らせします。
When you turn on the power of the neck speaker, the current selector (input source)
position
will be announced by voice.
|
ON |
ネックスピーカーの電源を入れると、現在選択されているセレクター(入力切替)の位置を音声でお知らせします。
※お買い上げ時の設定です。
When you turn on the power of the neck speaker, the current selector (input source)
position will be announced by voice.
*This is the default setting at the time of purchase. |
|
OFF |
ネックスピーカーの電源を入れた際に流れるセレクター位置の音声案内をオフにします。
Disables the voice guidance that announces the selector position when the neck
speaker is
powered on.
|
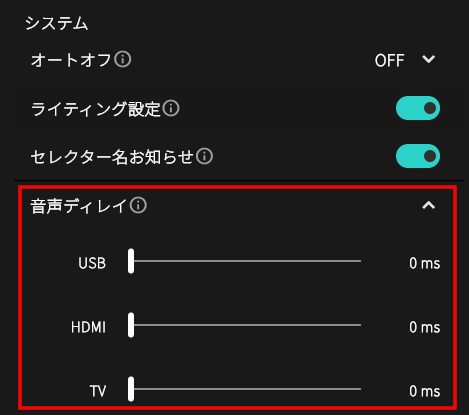
音声の遅延量を調整する [GNW30専用]
Adjust Audio Delay [only GNW30]
|
設定管理画面 > システム
Settings Management Screen > System
|
映像と音声がずれが気になる場合は、音声の出力タイミングを遅らせて映像と合わせることができます。
If you notice a mismatch between video and audio, you can delay the audio output timing
to synchronize it with the video.
音声ディレイはUSB、HDMI、TVごとに設定できます。各入力ごとに、0msから150msまで調整できます。初期設定(お買い上げ時)はすべて0msです。
You can set the audio delay individually for USB, HDMI, and TV. For each input, the delay
can be adjusted from 0ms to 150ms. The default setting for all inputs is 0ms.
Bluetooth自動接続設定を変更する [GNW30専用]
Change Bluetooth Auto-Connect Settings [only GNW30]

|
設定管理画面 > 接続
Settings Management Screen > Connect
|
送信機とネックスピーカーが無線接続されると、最後に接続していたBluetooth機器へ自動的に接続するかどうかを設定できます。
You can set whether to automatically connect to the last paired Bluetooth device when the
transmitter and neck speaker are wirelessly connected.
|
ON |
最後に接続していたBluetooth機器に自動で接続します。
※お買い上げ時の設定です。
Automatically connects to the last paired Bluetooth device.
*This is the default setting at the time of purchase. |
|
OFF |
自動的には接続しません。手動でBluetooth機器に接続してください。
Does not connect automatically. Please connect to the Bluetooth device manually.
|
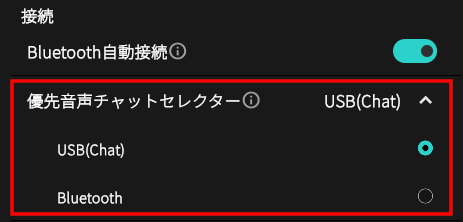
優先音声チャットセレクター設定を変更する [GNW30専用]
Change Preferred Voice Chat Selector Settings [only GNW30]
|
設定管理画面 > 接続
Settings Management Screen > Connect
|
USB(Chat)とBluetoothの両方が接続されている場合、音声チャットに使用するセレクター(入力)を選択できます。
どちらか一方のみが接続されている場合は、接続されているセレクターが自動的に選択されます。
どちらか一方のみが接続されている場合は、接続されているセレクターが自動的に選択されます。
When both USB (Chat) and Bluetooth are connected, you can select which input (selector) to
use
for voice chat.
If only one is connected, the connected selector will be chosen automatically.
If only one is connected, the connected selector will be chosen automatically.
HDMI Control 設定を変更する [GNW30専用]
Change HDMI Control Settings [only GNW30]

|
設定管理画面 > HDMI
Settings Management Screen > HDMI
|
|
ON |
ONにすると、HDMI CEC(Consumer Electronics Control)機能が有効になります。
※お買い上げ時の設定です。
When set to ON, the HDMI CEC (Consumer Electronics Control) feature is enabled.
*This is the default setting at the time of purchase. |
|
OFF |
OFFにすると、HDMI CEC(Consumer Electronics Control)機能が無効になります。
When set to OFF, the HDMI CEC (Consumer Electronics Control) feature is disabled.
|
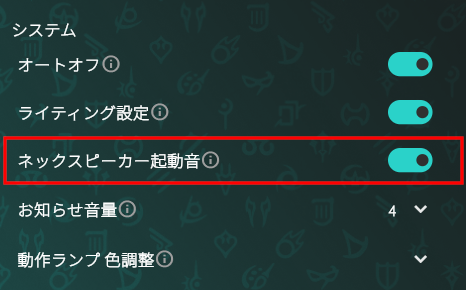
ネックスピーカー起動音の設定を変更する [GNW10S-BH, GNW10S-FF専用]
Change Neck Speaker Power-On Sound Settings [only GNW10S-BH and
GNW10S-FF]
|
設定管理画面 > システム
Settings Management Screen > System
|
ネックスピーカーの電源を入れた際に流れる各モデル専用の起動音のオン/オフを変更できます。
・GNW10S-BH:「バイオハザード レクイエム エディション」の起動音
・GNW10S-FF:「ファイナルファンタジーXIV エディション」の起動音
※ご使用のモデルに応じた起動音のみが再生されます。
・GNW10S-BH:「バイオハザード レクイエム エディション」の起動音
・GNW10S-FF:「ファイナルファンタジーXIV エディション」の起動音
※ご使用のモデルに応じた起動音のみが再生されます。
You can turn the power-on sounds on or off.
GNW10S-BH: Power-on sound for "Resident Evil: Requiem Edition"
GNW10S-FF: Power-on sound for "FINAL FANTASY XIV Edition"
Note: Only the power-on sound for your model will play.
GNW10S-BH: Power-on sound for "Resident Evil: Requiem Edition"
GNW10S-FF: Power-on sound for "FINAL FANTASY XIV Edition"
Note: Only the power-on sound for your model will play.
|
ON |
ネックスピーカーの電源を入れると、起動音が再生されます。
※お買い上げ時の設定です。
A power-on sound plays when the neck speaker is turned on.
*This is the default setting at the time of purchase. |
|
OFF |
ネックスピーカーの電源を入れた際に流れる起動音をオフにします。
Turn off the power-on sound that plays when the neck speaker is turned on.
|
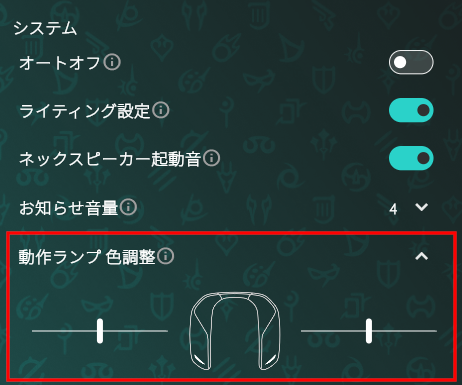
ネックスピーカーの動作ランプの色を調整する [GNW10S-BH, GNW10S-FF専用]
Adjust Neck Speaker Status Indicator Light Color [only GNW10S-BH and
GNW10S-FF]
|
設定管理画面 > システム
Settings Management Screen > System
|
ネックスピーカーの左右の動作ランプの色を調整できます。
・GNW10S-BH:水色、赤色
・GNW10S-FF:水色、青色、緑色、赤色
※ご使用のモデルに応じた動作ランプの色を調整できます。
・GNW10S-BH:水色、赤色
・GNW10S-FF:水色、青色、緑色、赤色
※ご使用のモデルに応じた動作ランプの色を調整できます。
You can adjust the color of the left and right status indicator lights on the neck speaker.
GNW10S-BH: Light blue, Red
GNW10S-FF: Light blue, Blue, Green, Red
Note: You can adjust the status indicator light color. Available options vary by model.
GNW10S-BH: Light blue, Red
GNW10S-FF: Light blue, Blue, Green, Red
Note: You can adjust the status indicator light color. Available options vary by model.
[お知らせ]
・動作ランプの色は、動作ランプ色ごとに個別に調整できます。
・現在選択している動作ランプの色を調整できます。
・動作ランプの色の変更は以下をご覧ください。
(⇒「動作ランプの色を変更する」)
・動作ランプの色は、動作ランプ色ごとに個別に調整できます。
・現在選択している動作ランプの色を調整できます。
・動作ランプの色の変更は以下をご覧ください。
(⇒「動作ランプの色を変更する」)
[Notice]
・The color of the status indicator lights can be adjusted individually for each color.
・You can adjust the color of the status indicator lights that is currently selected.
・For changing the color of the status indicator lights, please see below.
(⇒"Change Status Indicator Light Color")
・The color of the status indicator lights can be adjusted individually for each color.
・You can adjust the color of the status indicator lights that is currently selected.
・For changing the color of the status indicator lights, please see below.
(⇒"Change Status Indicator Light Color")
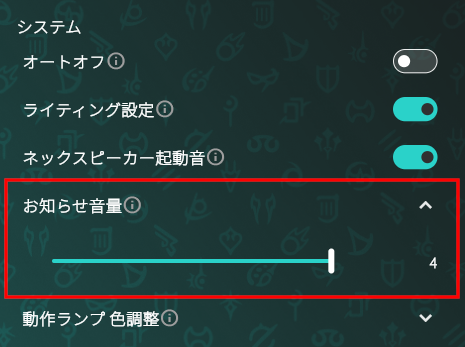
お知らせ音量を調整する [GNW10S-BH, GNW10S-FF専用]
Adjust notification sound volume [only GNW10S-BH and GNW10S-FF]
|
設定管理画面 > システム
Settings Management Screen > System
|
ネックスピーカーのお知らせ音量を4段階で調整することができます。
初期設定(お買い上げ時)は「4(最大) 」です。
初期設定(お買い上げ時)は「4(最大) 」です。
You can adjust the neck speaker's notification sound volume in 4 levels.
The default setting at the time of purchase is "4 (maximum)".
The default setting at the time of purchase is "4 (maximum)".
お知らせ音量を変更時に、変更後の音量で現在のサウンドモードが再生されます。
ご利用環境に合わせて適切な音量に調整してご使用ください。
ご利用環境に合わせて適切な音量に調整してご使用ください。
When you change the notification sound volume, the current sound mode will be played at
the
new volume.
Please adjust to an appropriate volume according to your environment.
Please adjust to an appropriate volume according to your environment.
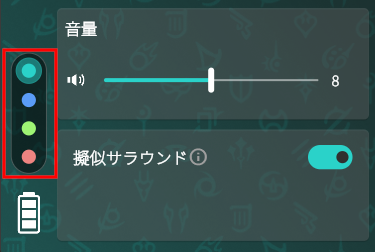
動作ランプの色を変更する [GNW10S-BH, GNW10S-FF専用]
Change Status Indicator Light Color [only GNW10S-BH and GNW10S-FF]
|
サウンドコントロール画面
Sound Control Screen
|
|
|
設定管理画面
Settings Management Screen
|
送信機とネックスピーカーの動作ランプの色を変更することができます。
GNW10S-BH:水色、赤色から選択できます。
GNW10S-FF:水色、青色、緑色、赤色から選択できます。
初期設定(お買い上げ時)は「水色」です。
GNW10S-BH:水色、赤色から選択できます。
GNW10S-FF:水色、青色、緑色、赤色から選択できます。
初期設定(お買い上げ時)は「水色」です。
You can change the color of the status indicator light on the transmitter and neck speaker.
GNW10S-BH: Available colors: light blue, red. GNW10S-FF: Available colors: light blue, blue, green, red. The default setting at the time of purchase is "Light Blue".
GNW10S-BH: Available colors: light blue, red. GNW10S-FF: Available colors: light blue, blue, green, red. The default setting at the time of purchase is "Light Blue".
[お知らせ]
・動作ランプの色は、ネックスピーカーの電源ボタンを押すことでも切り替えることができます。
・本アプリの画面デザインは、動作ランプの色に連動して変化します。
・ネックスピーカーの動作ランプの色を調整する場合は、以下をご覧ください。
(⇒「ネックスピーカーの動作ランプの色を調整する」)
・動作ランプの色は、ネックスピーカーの電源ボタンを押すことでも切り替えることができます。
・本アプリの画面デザインは、動作ランプの色に連動して変化します。
・ネックスピーカーの動作ランプの色を調整する場合は、以下をご覧ください。
(⇒「ネックスピーカーの動作ランプの色を調整する」)
[Notice]
・You can also change the color of the status indicator lights by pressing the power button on the neck speaker.
・The design of this app's screen changes in conjunction with the color of the status indicator lights.
・For adjusting the color of the neck speaker's status indicator lights, please see below.
(⇒"Adjust Neck Speaker Status Indicator Light Color")
電池残量を確認する
Check remaining battery level
|
サウンドコントロール画面
Sound Control Screen
|
|
|
設定管理画面
Settings Management Screen
|
ネックスピーカーの電池残量を表します。
The battery level of the neck speaker is indicated.
|
|
電池残量が71%以上(100%~71%) です。
Indicates that the battery level is 71% or higher (between
100% and 71%).
|
|
|
電池残量が70%~21% です。
Indicates that the battery level is between 70% and 21%.
|
|
|
電池残量が20%~6% です。
Indicates that the battery level is between 20% and 6%.
|
|
|
電池残量が5%以下 です。
Indicates that the battery level is 5% or lower.
|
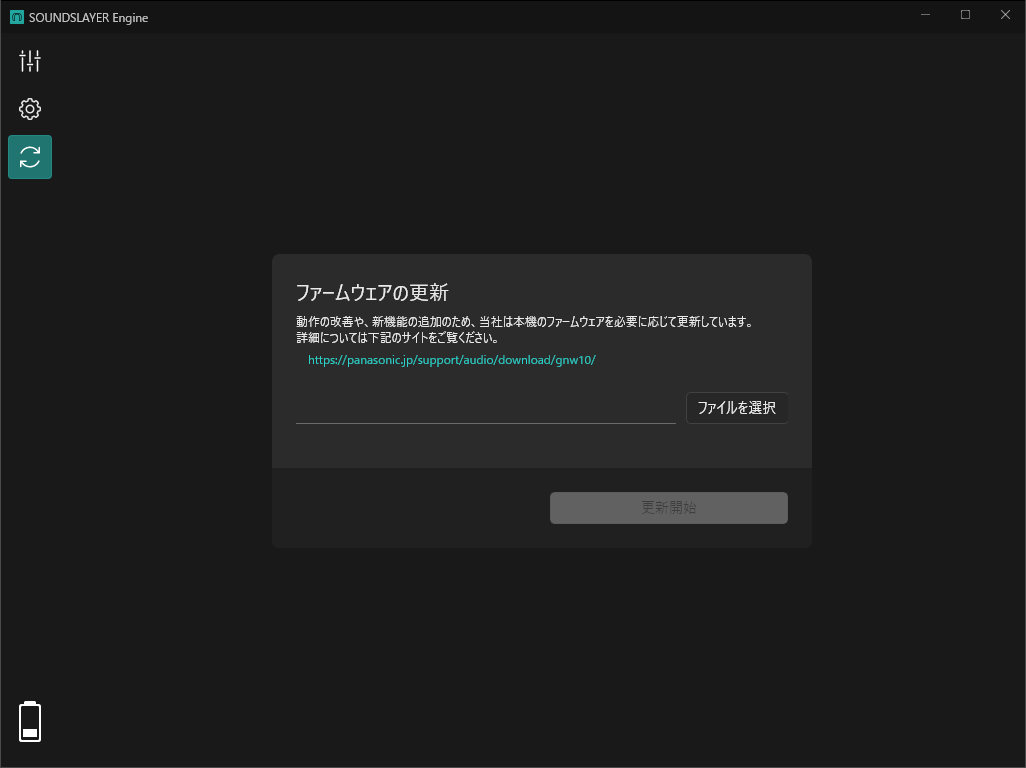
本体のファームウェアを更新する
Update the device firmware
|
ファームウェア更新画面
Firmware update screen
|
動作の改善や新機能の追加のため、本機のファームウェアを必要に応じて更新しています。
詳細については以下のサイトをご覧ください。
詳細については以下のサイトをご覧ください。
We update the firmware of this device as necessary to improve operation and add new
features.
Please see the website below for details.
Please see the website below for details.
| SC-GNW30 | |
|
SC-GNW10S-BH
SC-GNW10S-FF SC-GNW10S |
|
| SC-GNW10 |
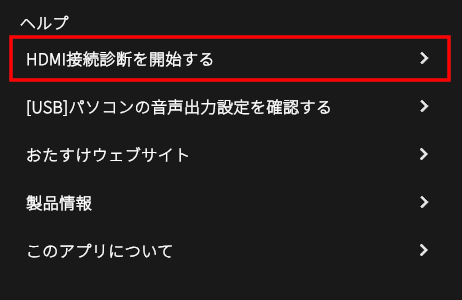
HDMI接続診断を開始する [GNW30専用]
Start HDMI connection diagnostics [only GNW30]
|
設定管理画面 > ヘルプ > HDMI接続診断を開始する
Settings Management Screen > Help > Start HDMI connection
diagnostics
|
画面の案内に沿って接続状況と、状態の改善に役立つ対処方法を確認できます。
診断結果画面では「よくある原因」と「おすすめの対処」を表示します。
機器の状態やタイミングにより、診断結果が毎回同じにならない場合があります。現在の症状に合致する内容を選んで確認してください。
診断結果画面では「よくある原因」と「おすすめの対処」を表示します。
機器の状態やタイミングにより、診断結果が毎回同じにならない場合があります。現在の症状に合致する内容を選んで確認してください。
You can check the connection status and troubleshooting methods to help improve the
situation by following the on-screen instructions.
The diagnostic results screen displays "Common Causes" and "Recommended Actions."
Depending on the device's status and timing, the diagnostic results may vary each time. Please select and check the content that matches your current symptoms.
The diagnostic results screen displays "Common Causes" and "Recommended Actions."
Depending on the device's status and timing, the diagnostic results may vary each time. Please select and check the content that matches your current symptoms.
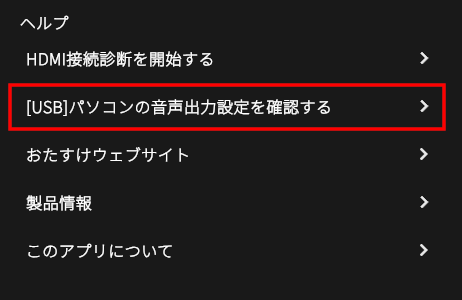
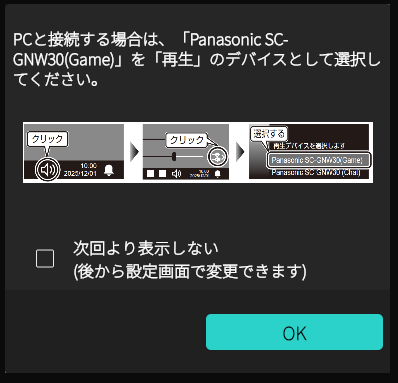
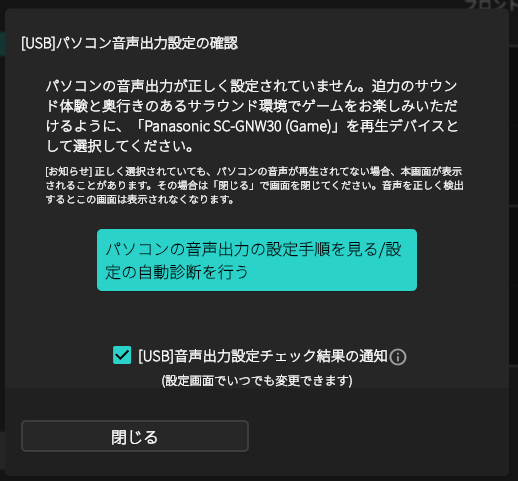
[USB]パソコンの音声出力設定を確認する
[USB]Check the PC's audio output settings
|
設定管理画面 > ヘルプ > [USB]パソコンの音声出力設定を確認する
Settings Management Screen > Help > [USB]Check the PC's audio
output settings
|
パソコンとUSB接続している場合に、パソコンの音声出力設定を確認できます。
You can check the PC's audio output settings when connected via USB.
本体のバージョンを確認する
Check the device firmware version
|
設定管理画面 > 製品情報
Settings Management Screen > Product Information
|
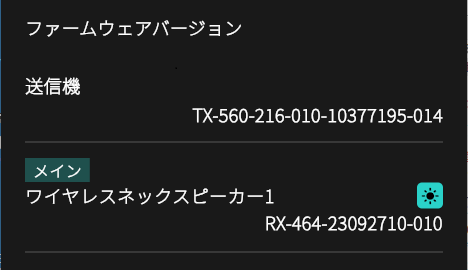
送信機およびネックスピーカーのファームウェアバージョンを確認できます。
これらの番号は、送信機やネックスピーカー本体のファームウェアバージョンを表しています。
バージョン番号は「560-216-010-10377195-014」や「464-23092710-010」のように、複数の数字が「-(ハイフン)」で区切られた形式です。
製品によって、ハイフンで区切られる数値の個数や桁数は異なります。
各数値は、新しいバージョンほど数字が大きくなります。数値を比較することで、新しいファームウェアかどうかを判別できます。
これらの番号は、送信機やネックスピーカー本体のファームウェアバージョンを表しています。
バージョン番号は「560-216-010-10377195-014」や「464-23092710-010」のように、複数の数字が「-(ハイフン)」で区切られた形式です。
製品によって、ハイフンで区切られる数値の個数や桁数は異なります。
各数値は、新しいバージョンほど数字が大きくなります。数値を比較することで、新しいファームウェアかどうかを判別できます。
You can check the firmware version of the transmitter and neck speaker.
These numbers indicate the firmware version of the transmitter or neck speaker.
The version number is shown in a format such as "560-216-010-10377195-014" or "464-23092710-010," with multiple numbers separated by hyphens ("-").
The number of digits and groups separated by hyphens varies depending on the product.
A larger number indicates a newer version. By comparing the numbers, you can determine which firmware is more recent.
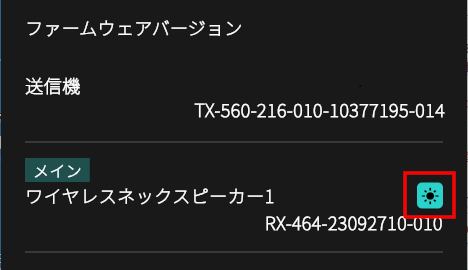
ネックスピーカーの本体を見分ける
Identify the neck speaker device
|
設定管理画面 > 製品情報
Settings Management Screen > Product Information
|
アイコン を選択すると、対応するネックスピーカーのランプが数秒間点滅します。
※SC-GNW10では、ファームウェアのバージョンによってはランプが点滅しない場合があります。
この機能をご利用いただくには、送信機とネックスピーカーのファームウェアを最新バージョンに更新してください。
※SC-GNW10では、ファームウェアのバージョンによってはランプが点滅しない場合があります。
この機能をご利用いただくには、送信機とネックスピーカーのファームウェアを最新バージョンに更新してください。
When you select the
icon,
the
lamp on the corresponding neck speaker will
blink
for
several seconds.
*On SC-GNW10, the lamp may not blink depending on the firmware version.
To use this feature, please update both the transmitter and neck speaker to the latest firmware version.
*On SC-GNW10, the lamp may not blink depending on the firmware version.
To use this feature, please update both the transmitter and neck speaker to the latest firmware version.
アプリケーションに関する情報
Application Information
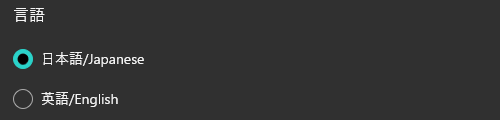
言語を変更する
Change language
|
設定管理画面 > このアプリについて
Settings Management Screen > About This App
|
表示言語を日本語または英語に切り換えることができます。
You can switch the display language between Japanese and English.
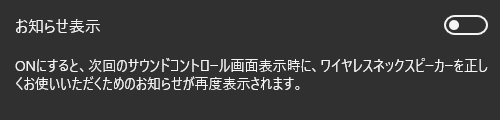
お知らせを再表示する(Windows 専用)
Redisplay notification [only Windows]
|
設定管理画面 > このアプリについて
Settings Management Screen > About This App
|
パソコン設定に関するお知らせを再表示できます。
ONに設定後、 アイコンを選択してサウンドコントロール画面に切り替えてください。
ネックスピーカーが送信機と無線接続されている場合に、お知らせが表示されます。
ONに設定後、
アイコンを選択してサウンドコントロール画面に切り替えてください。ネックスピーカーが送信機と無線接続されている場合に、お知らせが表示されます。
You can redisplay notifications regarding computer settings.
After setting to ON, select the icon to
switch
to the sound control screen.
A notification will be displayed when the neck speaker is wirelessly connected to the transmitter.
After setting to ON, select the
icon to
switch
to the sound control screen.A notification will be displayed when the neck speaker is wirelessly connected to the transmitter.
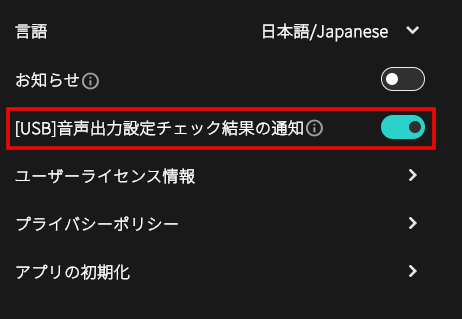
[USB]音声出力設定チェック結果の通知 [GNW30専用]
[USB]Notification of audio output setting check results [only GNW30]
|
設定管理画面 > このアプリについて
Settings Management Screen > About This App
|
ONにすると、パソコンの音声出力先として「Gameスピーカー」が選択されているかを定期的にチェックし、問題が見つかった場合はダイアログでお知らせします。常に快適に本機をご利用いただくため、ON設定をおすすめします。
When turned ON, it will periodically check whether "Game Speaker" is selected as the PC’s audio
output device and notify you with a dialog if a problem is detected. To ensure a consistently
smooth experience with this device, we recommend keeping this setting ON.
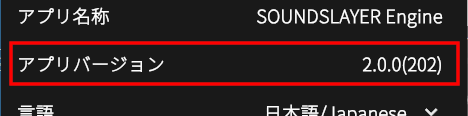
バージョンを確認する
Check version
|
設定管理画面 > このアプリについて
Settings Management Screen > About This App
|
本アプリケーションのバージョン番号を確認できます。
You can check the version number of this application.
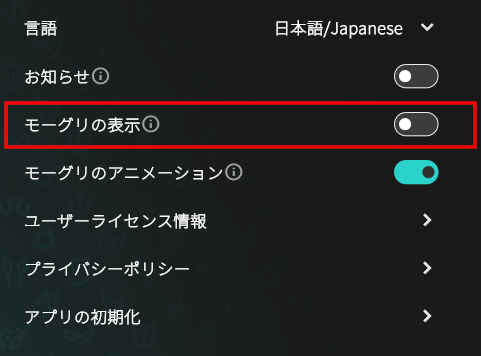
モーグリの表示設定を変更する [GNW10S-FF専用]
Change Moogle display settings [only GNW10S-FF]
|
設定管理画面 > このアプリについて
Settings Management Screen > About This App
|
モーグリの表示、非表示を切り替えることができます。
[お知らせ]
SC-GNW10S-FF「ファイナルファンタジーXIV エディション」をパソコンに接続すると、本メニューが利用できるようになります。
[お知らせ]
SC-GNW10S-FF「ファイナルファンタジーXIV エディション」をパソコンに接続すると、本メニューが利用できるようになります。
You can toggle the Moogle display on or off.
[Notice]
This menu becomes available when the SC-GNW10S-FF “FINAL FANTASY XIV Online Edition” is connected to your computer.
[Notice]
This menu becomes available when the SC-GNW10S-FF “FINAL FANTASY XIV Online Edition” is connected to your computer.
|
ON |
ONにすると、モーグリを表示します。
※アプリの初期値
ON: Enables the Moogle display.
*The app’s default setting. |
|
OFF |
OFFにすると、モーグリを非表示にします。
OFF: Disables the Moogle display.
|
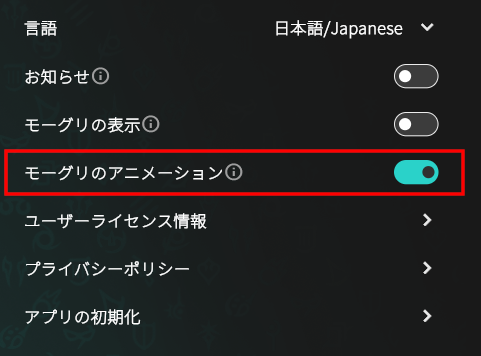
モーグリのアニメーション表示設定を変更する [GNW10S-FF専用]
Change Moogle animation display settings [only GNW10S-FF]
|
設定管理画面 > このアプリについて
Settings Management Screen > About This App
|
モーグリのアニメーション表示を切り替えることができます。
OFFに設定すると、アニメーションの代わりに静止画が表示されます。
[お知らせ]
SC-GNW10S-FF「ファイナルファンタジーXIV エディション」をパソコンに接続すると、本メニューが利用できるようになります。
OFFに設定すると、アニメーションの代わりに静止画が表示されます。
[お知らせ]
SC-GNW10S-FF「ファイナルファンタジーXIV エディション」をパソコンに接続すると、本メニューが利用できるようになります。
You can toggle the Moogle animation display on or off.
When set to OFF, a still image is displayed instead of an animation.
[Notice]
This menu becomes available when the SC-GNW10S-FF “FINAL FANTASY XIV Online Edition” is connected to your computer.
When set to OFF, a still image is displayed instead of an animation.
[Notice]
This menu becomes available when the SC-GNW10S-FF “FINAL FANTASY XIV Online Edition” is connected to your computer.
|
ON |
ONにすると、モーグリがアニメーションで表示されます。
※アプリの初期値
ON: Enables the Moogle animation display.
*The app’s default setting. |
|
OFF |
OFFにすると、モーグリが静止画で表示されます。
OFF: Displays the Moogle as a still image.
|
ユーザーライセンス情報を確認する
Check User License Information
|
設定管理画面 > このアプリについて > ユーザーライセンス情報
Settings Management Screen > About This App > User
License
Information
|
本アプリケーションのユーザーライセンス情報を確認できます。
You can check the user license information of this application.
プライバシーポリシーを確認・同意/非同意を設定する
Check and agree/disagree to the Privacy Policy
|
設定管理画面 > このアプリについて > プライバシーポリシー
Settings Management Screen > About This App > Privacy
Policy
|
本アプリケーションのプライバシーポリシーを確認できます。
プライバシーポリシーに同意いただくと、次の機能が利用できるようになります。
・製品の新しいファームウェア公開を自動で検出し、アプリ画面上にお知らせを表示する
(⇒「新しいファームウェアのお知らせの確認/ファームウェアを更新する」)
プライバシーポリシーに同意いただくと、次の機能が利用できるようになります。
・製品の新しいファームウェア公開を自動で検出し、アプリ画面上にお知らせを表示する
(⇒「新しいファームウェアのお知らせの確認/ファームウェアを更新する」)
・本アプリケーションの新しいバージョン公開を自動で検出し、アプリ画面上にお知らせを表示する(Windows / macOS 専用)
You can check the privacy policy of this application.
By agreeing to the privacy policy, you will be able to use the following features:
・Automatically detect new firmware releases for the product and display notifications on the app screen.
(⇒"Check for new firmware notifications / Update firmware")
By agreeing to the privacy policy, you will be able to use the following features:
・Automatically detect new firmware releases for the product and display notifications on the app screen.
(⇒"Check for new firmware notifications / Update firmware")
・Automatically detect new versions of this application and display notifications on
the app screen [Windows/macOS]
アプリの設定を初期化する
Initialize the App
|
設定管理画面 > このアプリについて > アプリの初期化
Settings Management Screen > About This App >
Initialize App
|
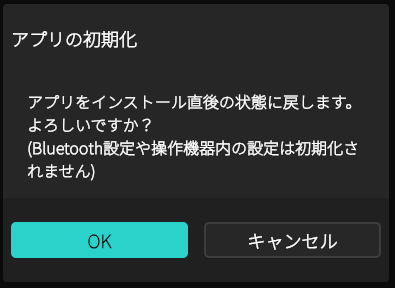
本アプリをインストール直後の状態に戻します。
(本体側の内部設定やBluetooth設定[GNW30のみ]は初期化されません)
(本体側の内部設定やBluetooth設定[GNW30のみ]は初期化されません)
This will restore the app to the state it was in immediately after installation.
(The internal settings of the device and Bluetooth settings [only GNW30] settings will not be initialized.)
(The internal settings of the device and Bluetooth settings [only GNW30] settings will not be initialized.)