
Convenient functions
Getting the right fit
Your earbuds need to be inserted snugly into your ears for optimal audio and performance.


Insert the earbud into your ear with the Panasonic logo on the bottom and the charging terminals on the top.
Twist the earbud back and forth until it is nice and snug. If they feel like they are coming loose when you move, try different sizes until you find one that stays in place.
Touch sensor operations
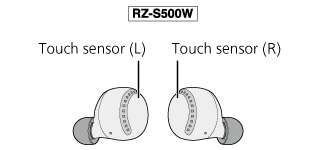
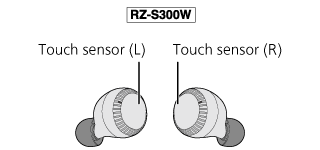
You can remotely control Bluetooth® devices with the touch sensors on the earphones.
- ・Depending on the Bluetooth® device, even when you operate the touch sensors on the earphones, there may be some functions that do not work or they may act differently to the way they are described below.
■ Touch sensor operations
| Function | Touch operations with the touch sensors | ||
|---|---|---|---|
| L | R | ||
Music |
Playback |
Single |
Single |
Volume (minimum)  |
Double |
― | |
Volume (maximum) |
Triple |
― | |
Forward a track  |
― | Double |
|
Back a track |
― | Triple |
|
Call |
Take call  |
Single |
Single |
Reject call  |
Approximately 2 seconds |
Approximately 2 seconds |
|
End call |
Approximately 2 seconds |
Approximately 2 seconds |
|
Ambient Sound Control |
― | Approximately 2 seconds |
|
Start voice assistant |
Approximately 2 seconds |
― | |
| Put in Bluetooth® pairing mode |
|
||
| Restore factory settings |
|
||


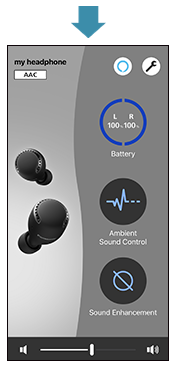
The main screen
Screen display is an example from RZ-S500W.
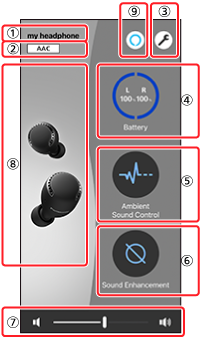
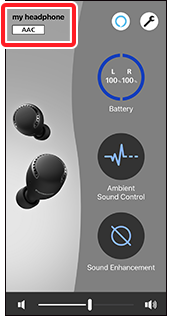
 Headphone name
- ・This shows the name of the connected headphones.
- ・You can edit the headphone name in “Setting”.
 Connected codec
- ・This shows the codec being used to connect the headphones.
| Codec | Indicator |
|---|---|
| SBC | |
| SBC (Prioritize connectivity enabled) |
|
| AAC |
- ・The codec used is selected from those codecs that your handset supports, so there may be codecs shown here that are not displayed.
 Setting button
- ・Tap the setting button to display the “” screen for this app.
 Remaining headphone battery charge indicator
- ・This shows the charge remaining for the headphones.
 Ambient Sound Control button
- ・You can tap the Ambient Sound Control button to set noise canceling and ambient (include external sounds).
- ・Make the settings in the screen displayed.
- *Only buttons for items your headphones support are displayed.
| Function | Indicator |
|---|---|
| Noise Cancelling Reduces the sounds (noise) you hear from outside. 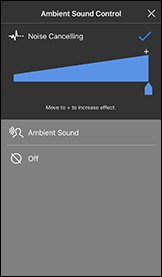 |
|
| Ambient Sound You can get sounds from around you and listen to them through your headphones. 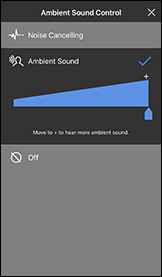 |
|
| Off |
 Sound Enhancement button
- ・Sets the sound mode
| Function | Indicator |
|---|---|
Bass Enhancer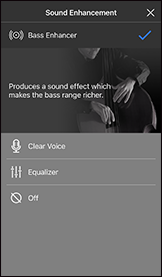 |
|
Clear Voice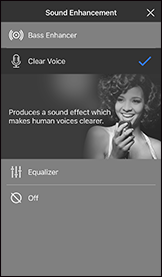 |
|
Equalizer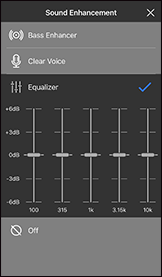 |
|
| Off |
 Volume bar
- ・This is linked to the volume of the media on the smartphone.
- ・You can adjust the volume by dragging the slider.
 Headphone image display
- ・This shows an image of the connected headphones.
- ・You can change the color of the headphones in “Body color” in “” in the setting screen. (The setting item is shown only when connected to headphones that are able to change the body color.)
 Amazon Alexa
- ・The button is displayed only when the headphones support the function.
- ・Alexa is not available in all languages and countries. Alexa features and functionality may vary by location.
- ・To use Alexa, install the latest Amazon Alexa app.
- ・After signing into Amazon, you will need to add headphones in the device setup.
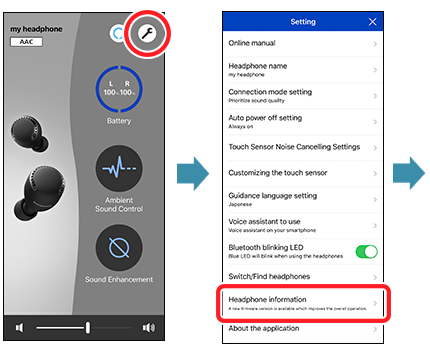
Settings
You can change a variety of settings for the headphones and this app in the setting screen.
(The items you can set depend on the connected model.)
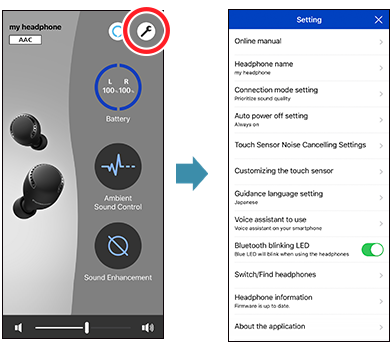
Tap the setting button to display the setting screen.
Tap the item you want to set.
Online manual
This shows the web page with the operating instructions for the connected headphones.
Headphone name
Change the “” displayed in the main screen, etc.
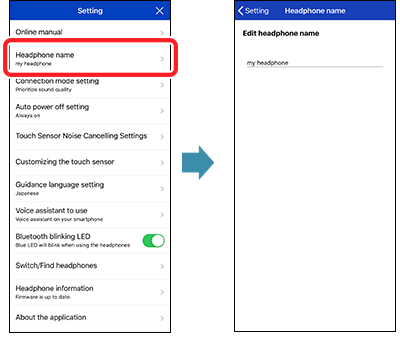
The headphone name in the following screens is changed.
Headphone name screen, setting screen, main screen, Screen showing a list of connected headphones
Example: When the headphone name is changed to “my headphone”
Connection mode setting
Set whether to use a connection between the handset and the headphones that prioritizes sound quality or one that prioritizes connectivity.
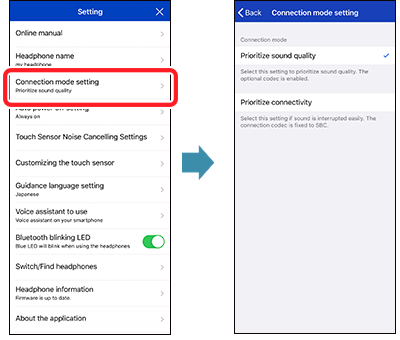
- ・Sound stops when you switch the connection mode, and then the device reconnects.
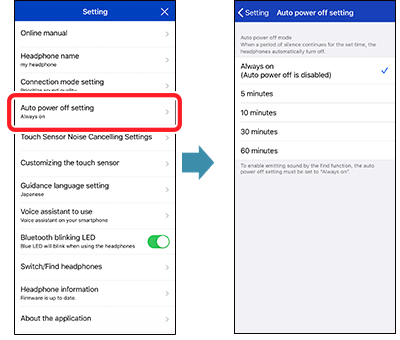
Auto power off setting
When a period of silence continues for the set time, the headphones automatically turn off.
Touch Sensor Noise Cancelling Settings
Set Touch Sensor Noise Cancelling Settings.
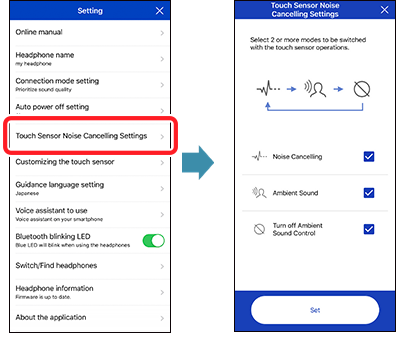
Select 2 or more modes to be switched with the touch sensor operations.
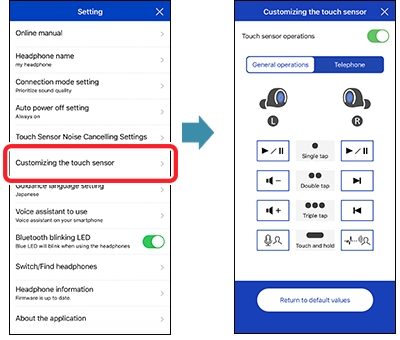
Customizing the touch sensor
You can disable touch sensor operations, customize the touch sensor, etc.
■When setting whether to accept touch sensor operations
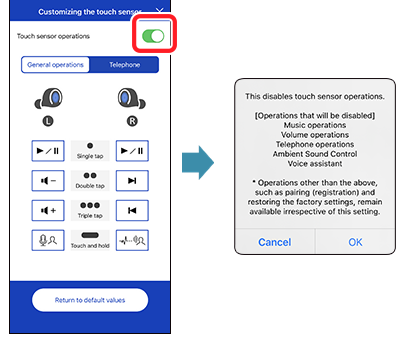
Sensor operations are disabled if you tap "OK".
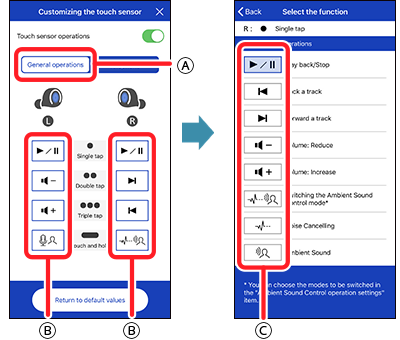
■When customizing the touch sensor
For "General operations"
For "Telephone"
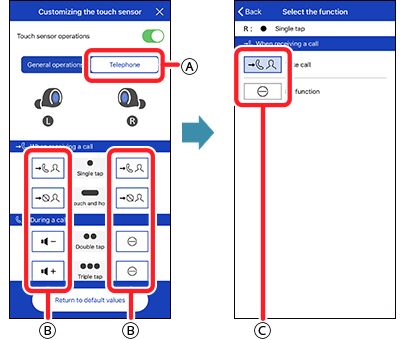
- -In
 , tap either "General operations" or "Telephone" to select which you want to customize.
 - -In
 , tap the operation you want to change.
 - -In
 , tap the function you want to change.
To return the customized settings to the original settings, tap "Return to default values".
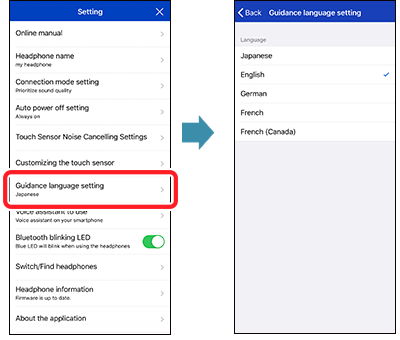
Guidance language setting
Switch the language used for audio guidance on the headphones.
Voice assistant to use
Set the "Voice assistant to use".
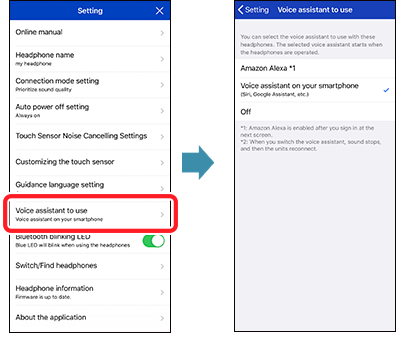
- ・The button is displayed only when the headphones support the function.
- ・Alexa is not available in all languages and countries. Alexa features and functionality may vary by location.
- ・To use Alexa, install the latest Amazon Alexa app.
- ・After signing into Amazon, you will need to add headphones in the device setup.
Bluetooth blinking LED
Blue LED will blink when using the headphones.
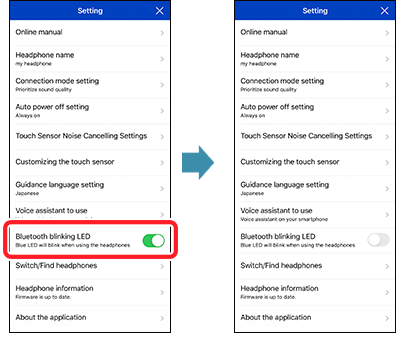
Blue LED will not blink when using the headphones.
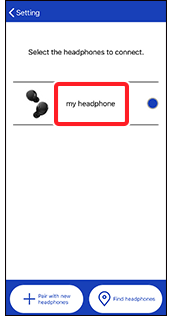
Switch/Find headphones
Switch the connected headphones and find headphones.
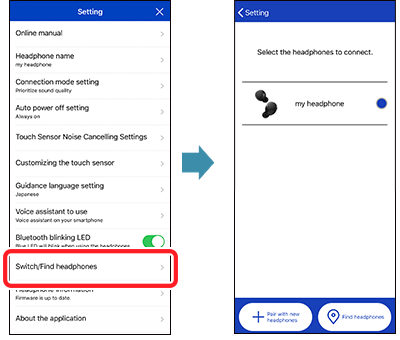
- ・You need to turn the setting on if you want to use the function for finding headphones.
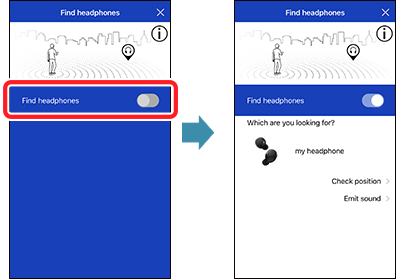
- ■When the headphones are nearby but you cannot find them
- (for example when you've dropped them somewhere near your sofa but can't see them)
- →Tap "Emit sound".
- ■When you have dropped them somewhere while moving and don't know where
- →Tap "Check position".
- *If the app on the smartphone is operating, you can find out the location information for most recent connection.
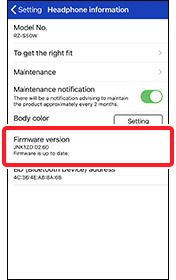
Headphone information
You can view product information about the headphones.
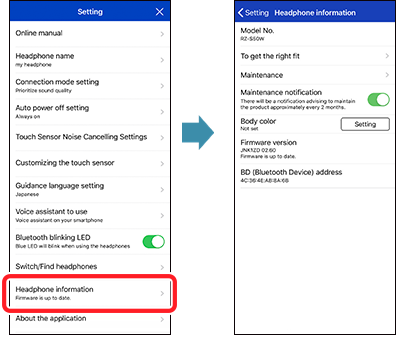
- ・The “Body color” item is shown only when connected to headphones that are able to change the body color. The image of the headphones shown in the “” changes when you change this setting.
- ・You can view the current version of the firmware used in the headphones in “Firmware Version”. If the latest version of the firmware is detected, tap “Update”.
About the application
You can view information about this app.
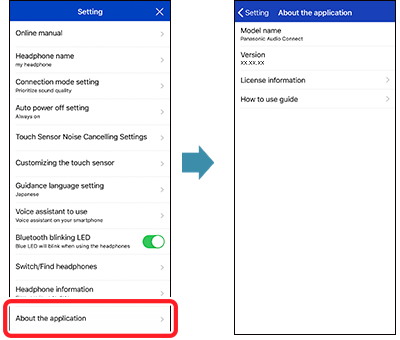
- ・License information is shown if you tap “License information”.
- ・Tap “How to use guide” to show the How to use guide (this guide).
Checking the firmware version and updating
You can use this app to update the firmware of the connected headphones.
- ・If the latest version of the firmware is detected, tap “Update”.
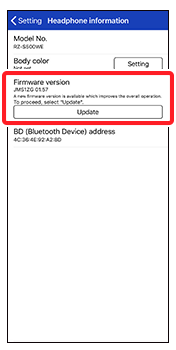
When you tap "Update", the firmware is transferred to the headphones and the update is made. Transfers may be interrupted or slowed down if music is played back or there is a call during the transfer. Start the transfer with the headphones outside of the charging cradle, set down close by and do not operate them.

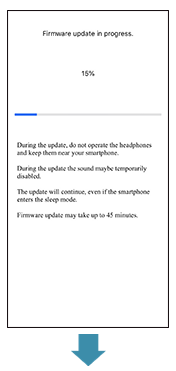
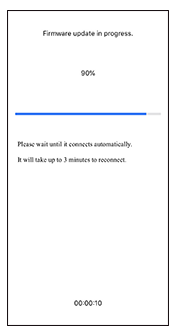
Wait until the update completes, without operating the headphones or the app.
* After updating the firmware, the headphones automatically restart and reconnect with the handset.
Until the update completes, the app will not work properly even if you try to operate it, so do not try to operate the headphones or the app.

If “Firmware is up to date.” is displayed in “Setting” > “Headphone information”, the firmware has been update to the latest version.
* For notifications in iOS9, refer to “Q11. Notifications regarding the completion of transfer or updates are not displayed.”