
Record
Switch screens
Swipe left or right as needed to switch between the a shot list screen, b recording screen, and c clip list.
This enables you to do a series of related operations all with your smartphone on location.
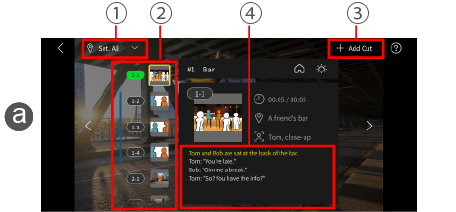
aShot List screen
1 Select location
By selecting a location, you can restrict display to the shots to record at that location.
2Recording reminder
By checking the color of takes, which changes after you rate them as OK or KEEP, you can know at a glance whether the takes you need have been recorded yet.
3Add shots
You can add blank shots either as subshots of the selected shot or at the end of the storyboard.
This is useful if you might want to shoot from unscheduled angles on location.
4Edit main text
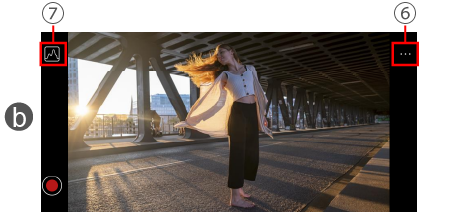
bRecording screen
You can use a smartphone as an external monitor for the camera.
For more details on how to connect the camera to a smartphone see the following link.
Connect the Camera to a Smartphone
5OK, KEEP, or BAD
You can rate each take OK, KEEP, or BAD.

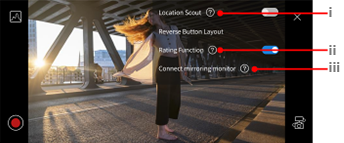
6Record menu
i Location Scout
When the Location Scout function is turned on, the smartphone camera launches when the LUMIX and the smartphone are not connected.
This is useful for test recording when scouting locations.
ii Rating Function
The rating function (OK/KEEP/NG) can be turned on and off.
iii Start Mirroring
Live view image on a smartphone connected via USB to the camera can be transferred to a smartphone or tablet for verification.
For more details on how to connect two smartphones, see the following link.
Connect a Mirroring Monitor
7Recording assisting functions
You can display useful functions for recording, such as Focus Peaking and LUT View Assist.
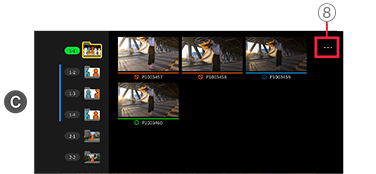
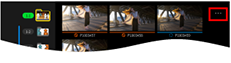
cClip list
Lists clips recorded for each shot.
To play a clip d, tap a thumbnail.
8Move to folder
You can move takes that were recorded out of order to the correct shot folder.
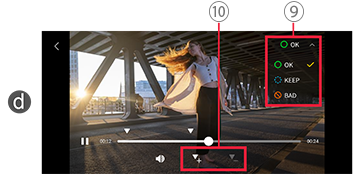
dClip playback screen
9Change OK, KEEP, or BAD ratings
10Mark
Setting markers is especially useful for long clips.
Markers also appear on the timelines in video editing software.
*[Export] is available after there is least one clip rated OK or KEEP.