![]() お客様サポート > 商品別サポート(AV機器・カメラ) >
お客様サポート > 商品別サポート(AV機器・カメラ) > ![]() ソフトウェア >
ソフトウェア > ![]() Voice Editing >
Voice Editing > ![]() ダウンロード >
ダウンロード > ![]() Voice Editingインストール手順
Voice Editingインストール手順![]()
ここから本文です。
Voice Editingインストール手順
Voice Editing Ver.2.00を例にして説明していますが、Ver.1.00も同様の手順です。
ドライブに、インストールCDを挿入してください。
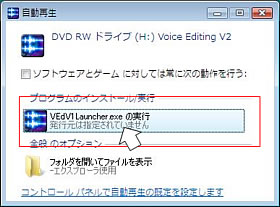
※オートスタートが始まらない場合は、CDドライブの¥Launcher\VEd1Launcher.exeをダブルクリックしてください。
下のダイアログが表示されますので実行をクリックしてください。

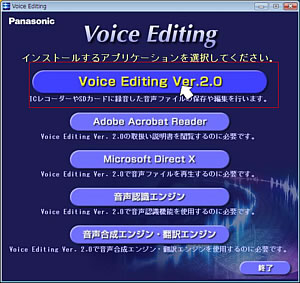
Voice Editing Ver.2.0ボタンをクリックしてください。
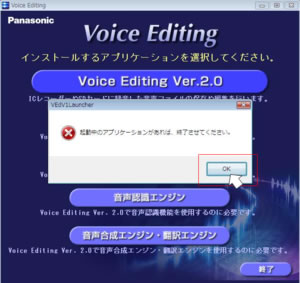
起動中のアプリケーションがあれば、終了させてください。
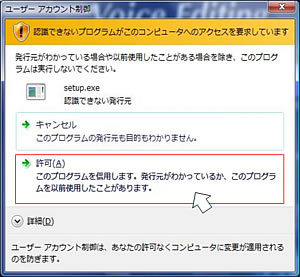
Setup.exeの許可(A)をクリックする。
OKをクリックする。
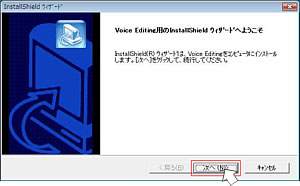
次へをクリックする。
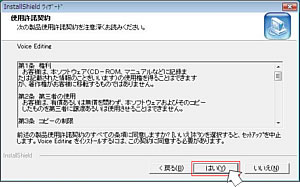
仕様許諾契約をお読みいただき、同意していただいた方のみ、「はい」をクリックしてください。
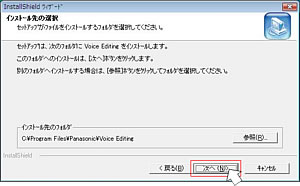
インストール先を選択して、「次へ」をクリックする。
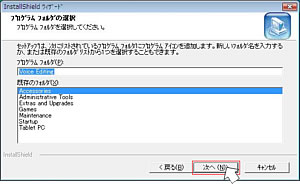
プログラム フォルダを選択して、「次へ」をクリックする。
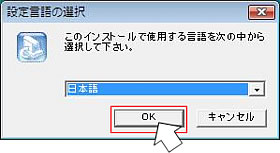
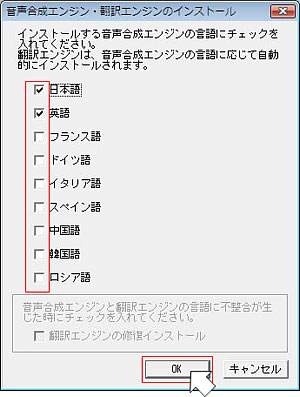
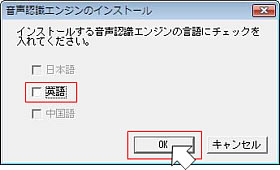
必要な言語にチェックを入れてOKをクリックしてください。
後から、音声合成エンジン・翻訳エンジンだけ追加することができます。
後から、音声合成エンジン・翻訳エンジンだけ追加することができます。
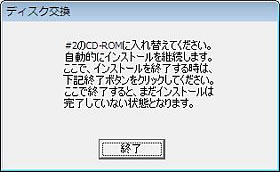
#2のディスクに入れ換える。
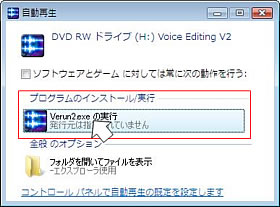
Verun2.exeの実行をクリックする。
音声認識エンジン英語のチェックボックスからチェックを外してOKをクリックしてください。
*Windows Vista®では動作しないのでインストールしないでください。
*Windows Vista®では動作しないのでインストールしないでください。
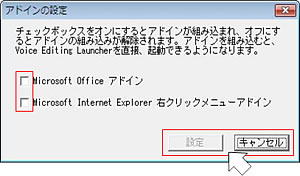
必要に応じて、チェックを入れて、設定ボタンをクリックしてください。
Office2003に対応しています、Offic2007には対応していません。
アドイン機能を設定しない場合は、「キャンセル」を押下してください。
Office2003に対応しています、Offic2007には対応していません。
アドイン機能を設定しない場合は、「キャンセル」を押下してください。
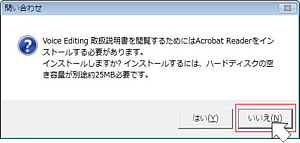
いいえをクリックしてください。(すでにインストールされている場合は、このダイアログが出ないことがあります。)
Voice EditingのインストールCDに付属のAcrobat Reader はWindows Vista®に対応していません。
Voice EditingのインストールCDに付属のAcrobat Reader はWindows Vista®に対応していません。
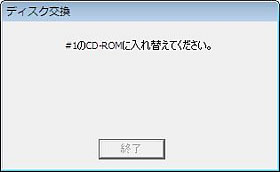
#1ディスクに入れ換えてください。
VEdV1Launcher.exeの実行をクリックしてください。
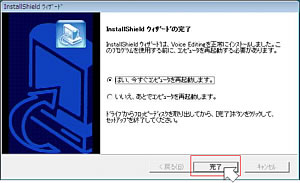
OKをクリックしてください。
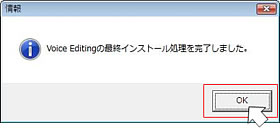
再起動してください。