 Gallery
Adding images to the app makes them available for playback or editing. Editing details can be saved as a LUT.
Importing images
Add images to the LUMIX Lab gallery by selecting them from the smartphone photo library or your camera.
- 1Tap
 >
>  .
. - 2Select [Add images from Device Gallery] or [Import images from LUMIX].
- Selecting [Import images from LUMIX] will establish a Wi-Fi connection with the camera. Select [Join] to connect the devices.
- 3Select images to add.
- The following images cannot be transferred.
Images with a file size exceeding 4 GB
Videos in MOV format - <When [Add images from Device Gallery] is selected>
It may not be possible to add certain images or to add multiple images at once, depending the model of smartphone or the OS version.
Editing/saving images
- 1Tap
 .
. - 2Tap a thumbnail.
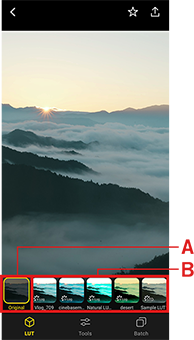
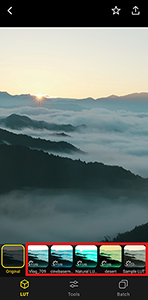
- 3Select a listed LUT to use in editing.
A [Original]: Original file, without a LUT applied
B: LUTs in the LUMIX Lab LUT library

- 4Tap
 .
. - 5Select a tool and adjust the image, then tap [✓].
- 6Tap
 .
. - 7Select [Save photo] or [Save video].
An image with your edited settings applied is saved to the smartphone camera roll.
- Touch and hold a preview image to see the original image before editing.
- Thumbnails of images that have editing information are identified by
 on the thumbnail in the
  list.
list. - LUTs in the LUMIX Lab LUT library can be applied to images during editing.
Creating LUTs
- 1Tap
 .
. - 2Tap a thumbnail.
- 3Tap
 .
. - 4Select [Create LUT].
- 5Enter a name and tap [Set].
- Your new LUT is added to LUMIX Lab LUT library.
- It is saved as a 3D LUT file in 33-grid Cube format.
Applying LUTs
- 1Tap
 .
. - 2Tap a thumbnail.
- 3Select a LUT to apply.

- 4Tap the selected LUT again, adjust [Opacity], then tap [✓].
- 5Tap
 .
. - 6Select a tool and adjust the image, then tap [✓].
- 7Tap
 .
. - 8Select [Save photo] or [Save video].
- An image with your edited settings applied is saved to the smartphone photo library.
