
Create Script / Storyboard
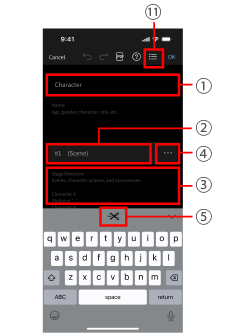
[1. Create a script]
1Characters
Enter details such as character traits or personalities.
2Scene
Enter the location of the scene, whether indoors or outdoors, and the times of day.
3Main text
Enter stage directions (such as for events or character actions) and dialogue.
4Display the Edit menu
Scene and shot additions, etc. can be performed from the Edit menu.
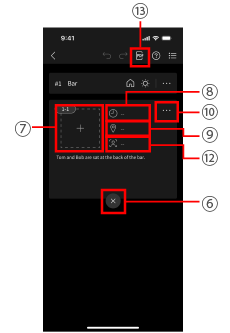
[2. Create a storyboard]
5Create Shot
Move the cursor to the position where you wish to change the angle of the script created in 3 and tap 5[![]() ] to add the shot.
] to add the shot.
*After you have marked the end of all shots in the script, you can go to the next step, [Record].
6Delete the camera blocking
Modify the camera blocking position.
All information other than the text in the lower shot is deleted.
7Switch to drawing screen
Insert images and easily create illustrations.
8Time per shot
Enter the time if you wish to allocate time to each shot.
The total length is also shown.
9Location
Enter the location. By selecting a location when it is time to record, you can restrict display to the shots to record at that location.
10Display the Edit menu
Scene and shot additions, etc. can be performed from the Edit menu.
11Switch to list view
[3. Create a shot list]
12Group Shots
Shots with the same angle can be grouped together by setting the shot group name.
Shots and shot groups can be used as a shot list during recording.
[4. Share with staffers and performers]
13Export to PDF
After you finish preparing the shot list, you can export the script or storyboard as a PDF file.