
Import an XML File into Editing Software
- DC-S1M2 (Version 1.1), iPhone 15 (iOS 17.4), LUMIX Flow (Version 1.2.0)
- MacBook Air (13-inch, M3, 2024), macOS (Sequoia 15.3.2)
■ When using Adobe Premiere Pro [Verified version: 25.1.0]
- 1 Connect your PC to LUMIX and copy the video files of the project.
*If you saved XML files in your smartphone, please copy them to the PC.
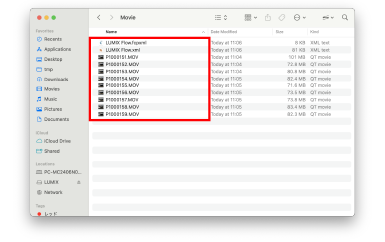
- 2 Place all of the video files of the project in one folder.
*Of the two file types, “.xml” and “.fcpxml”, the “.xml” file is used.
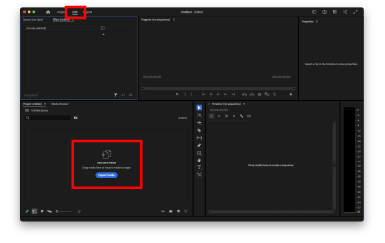
- 3 Launch Adobe Premiere Pro to create a new project.
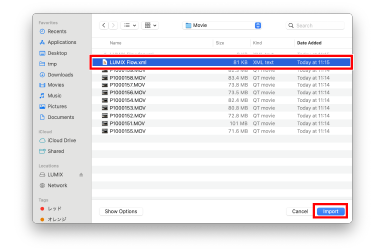
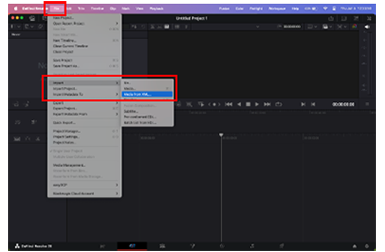
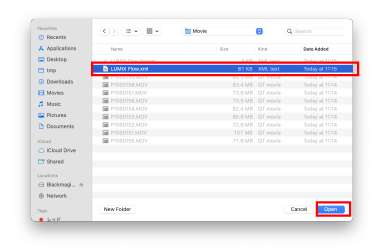
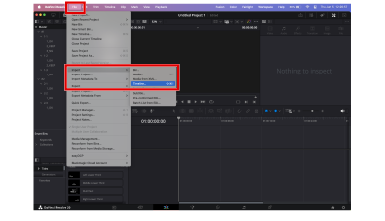
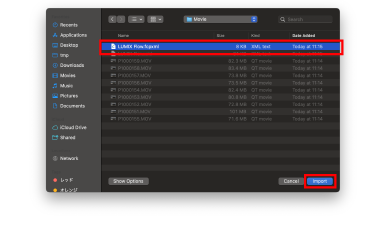
- 4 Under the “edit” tab, select “Import Media” on the left and specify an XML file.
*You can also drag and drop an XML file.
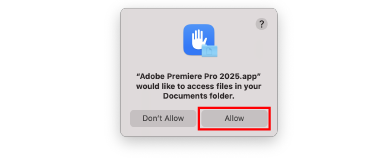
- 5 If access to files is requested, select “Allow”.
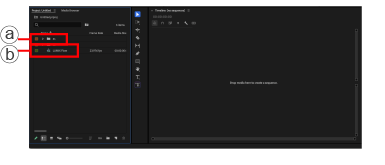
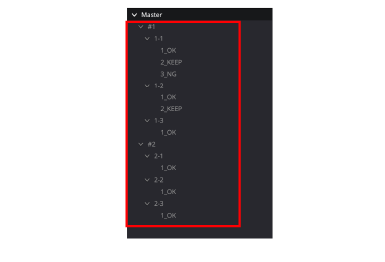
- 6 Click a to expand the folder.
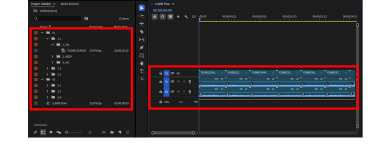
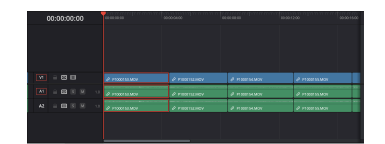
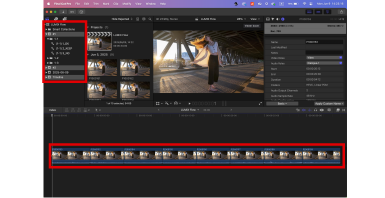
Click b to expand the timeline.Video data is automatically organized according to the storyboard created in LUMIX Flow, and a timeline appropriate for each workflow is created.
*“OK” and “KEEP” rated takes are placed on the timeline in storyboard order.
*For Workflow B, two timelines “Lip-sync” and “B-roll” are created.
■ When using DaVinci Resolve [Verified version: 20.0]
*DaVinci Resolve requires the same XML file to be read twice in order to automatically create folders and timelines.
- 1 Connect your PC to LUMIX and copy the video files of the project.
*If you saved XML files in your smartphone, please copy them to the PC.
- 2 Place all of the video files of the project in one folder.
*Of the two file types, “.xml” and “.fcpxml”, the “.xml” file is used.
- 3 Launch DaVinci Resolve to create a new project.
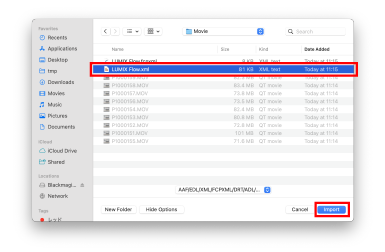
- 4 Select “File > Import > Media from XML...” and specify an XML file.
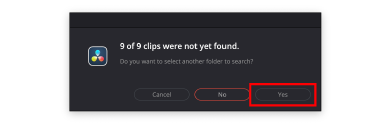
- 5 When the pop-up message is displayed, select “Yes”.
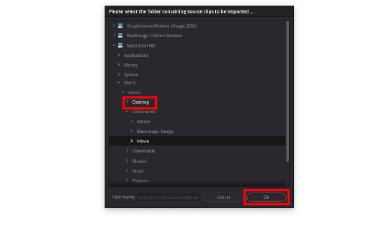
- 6 Specify the folder containing the video data and XML files prepared in advance, and select “Ok”.
- 7 Video data is automatically organized by scene and shot as created in LUMIX Flow.
- 8 Select “File > Import > Timeline...” and specify an XML file.
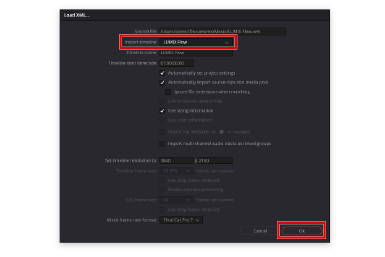
- 9 Set the timeline and select “Ok”.
*For Workflow B, select “Lip-sync” or “B-roll” from the “Import timeline” pull-down menu.
*To import both timelines, go back to Step 8 and import the other timeline by changing the selection from the menu.
- 10 A timeline suitable for each workflow is automatically created.
*“OK” and “KEEP” rated takes are placed on the timeline in storyboard order.
■ When using Final Cut Pro [Verified version: 11.0.1]
- 1 Connect your PC to LUMIX and copy the video files of the project.
*If you saved XML files in your smartphone, please copy them to the PC.
- 2 Place all of the video files of the project in one folder.
*Of the two file types, “.xml” and “.fcpxml”, the “.fcpxml” file is used.
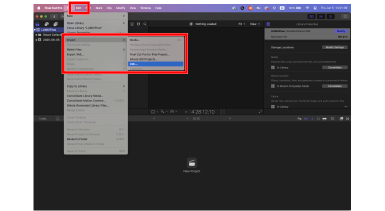
- 3 Create a new library.
- 4 Select “File > Import > XML...” and specify an FCPXML file.
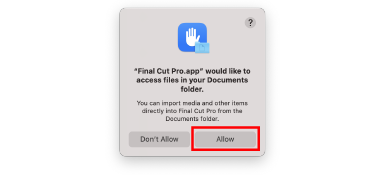
- 5 If access to files is requested, select “Allow”.
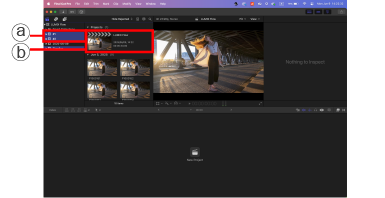
- 6 Click a to expand the folder.
Click b to expand the timeline.Video data is automatically organized according to the storyboard created in LUMIX Flow, and a timeline appropriate for each workflow is created.
*“OK” and “KEEP” rated takes are placed on the timeline in storyboard order.
*For Workflow B, two timelines “Lip-sync” and “B-roll” are created.