![]() Digital AV Support > Digital Camera > FAQ > About Wi-Fi connection between the camera and Windows 10
Digital AV Support > Digital Camera > FAQ > About Wi-Fi connection between the camera and Windows 10
Text begins from here.
About Wi-Fi connection between the camera and Windows 10
Problem
Connection with Windows 10 PC from the camera fails by the following procedure.
• Enter the PC connection function by selecting the associated menu in the following order.
[Setup] ⇒ [Wi-Fi] ⇒ [Wi-Fi Function] ⇒ [New Connection] ⇒
[Send Images While Recording] or [Send Images Stored in the Camera] ⇒
[PC] ⇒ [Direct]
[Send Images While Recording] or [Send Images Stored in the Camera] ⇒
[PC] ⇒ [Direct]
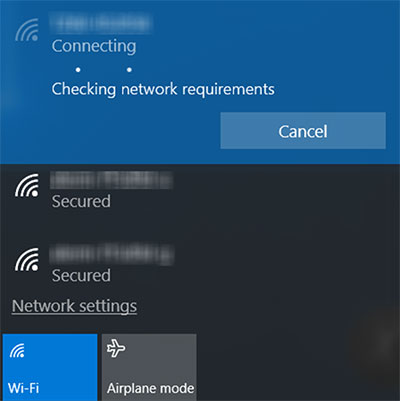
• Even though you select the correct SSID of the camera in the destination list of Wi-Fi connection on Windows 10 PC, the message "Checking network requirements" keeps displayed and the connection does not complete.
Solution
Please try the following procedure.
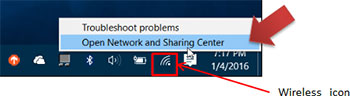
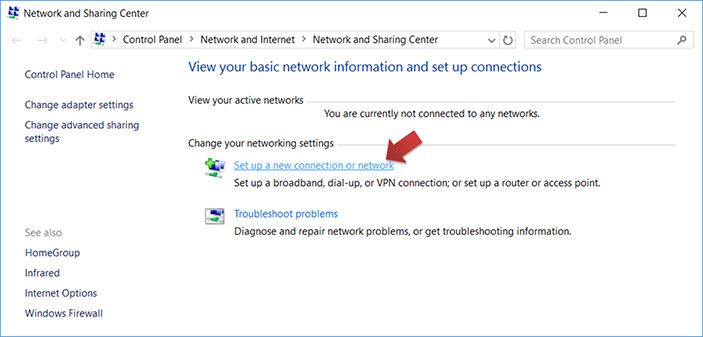
- Open the below menu by right clicking the wireless icon at the right bottom of the Windows desktop.
- The "Network and Sharing Center" panel appears. Then, select "Set up a new connection or network".
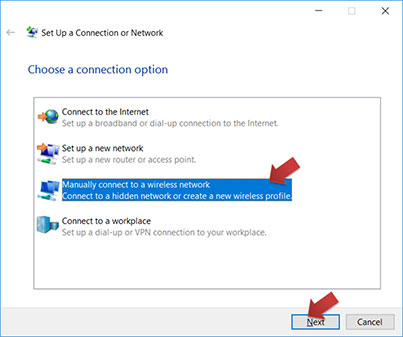
- The "Set Up a Connection or Network" panel appears. Then, select "Manually connect to a wireless network" and click the "Next" button.
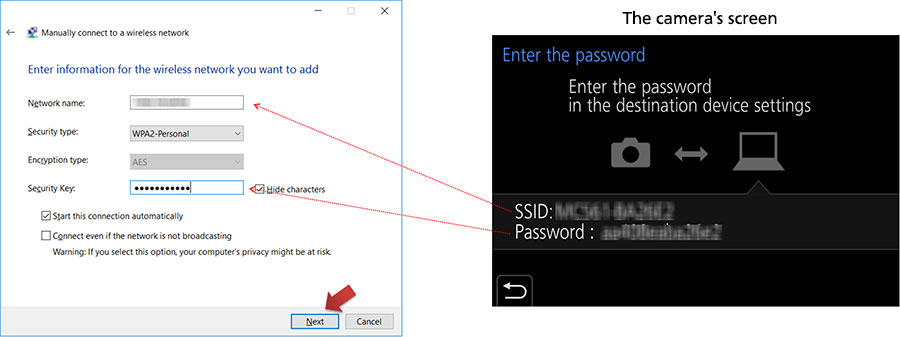
- The "Manually connect to a wireless network" panel appears. Then, fill the form according to the following procedure referring the camera screen.
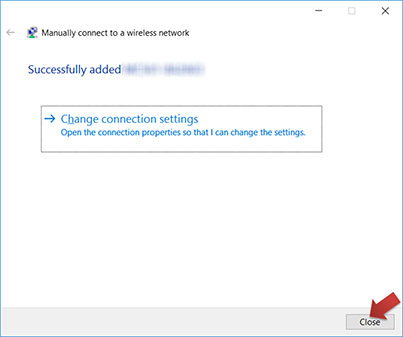
- If the connection completed successfully, the message "Successfully added ... " appears. Then, click the "Close" button.
* Input the SSID displayed on the camera screen to the "Network name" field.
* Select "WPA2-Personal" as the "Security type".
* Input the password displayed on the camera screen to the "Security Key" field.
* And click the "Next" button.