
![]() Digital AV Support > Blu-ray Disc™ Player/Recorder > Application > Enjoy your Blu-ray Disc™ Player with Panasonic Blu-ray Remote 2012 > Setup Your Player
Digital AV Support > Blu-ray Disc™ Player/Recorder > Application > Enjoy your Blu-ray Disc™ Player with Panasonic Blu-ray Remote 2012 > Setup Your Player
Setup Your Player
Let's configure your Panasonic Blu-ray Disc™ Player using the bundled IR remote control.
(Details are different depending on the model and destination.)
Home Screen to Network Settings
Step-1
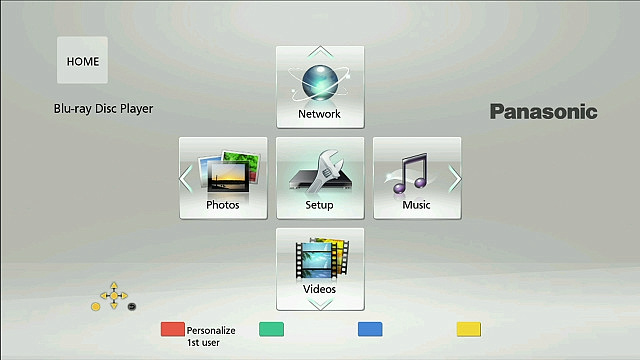
Turn on your Panasonic Blu-ray Disc™ Player. Choose "Setup" using your IR Remote, when you see the Home Screen.
Step-2
Choose "Player Settings" using your IR Remote.

Network Settings to Wireless Network (Wi-Fi) Settings
Step-3
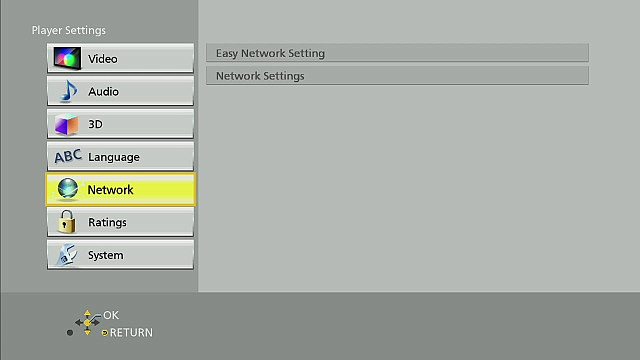
Choose "Network" on the list in Player Settings.
Step-4
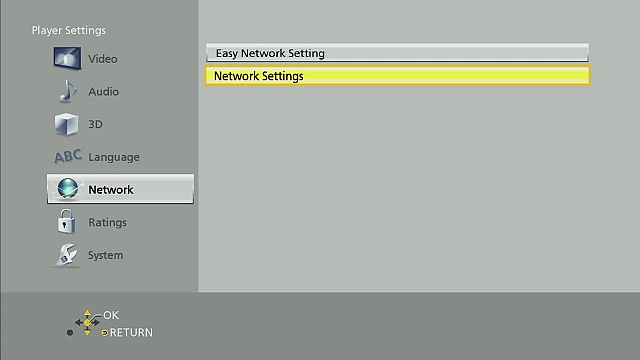
Choose "Network Settings" on the list in Network.
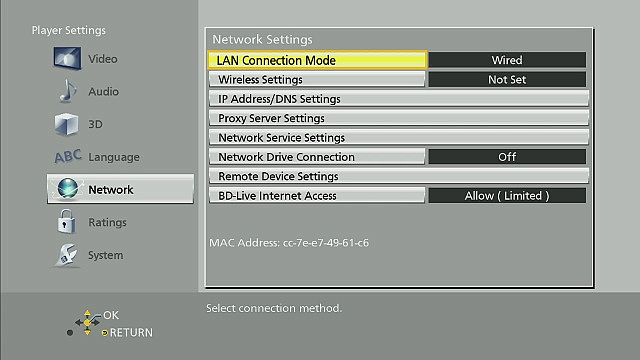
Step-5 thru Step-16 are for wireless setting (Wi-Fi). Your Panasonic Blu-ray Disc™ Player has wired connection as well as wireless connection (Wi-Fi). If you will use wired connection, you can use wired connection with a LAN cable to plug into LAN connector on the back panel. After activating wired connection, you can skip Step-5 thru Step-16, and then start Step-17.
Wireless Network (Wi-Fi) Settings
Step-5
Choose "LAN Connection Mode" on the list in Network Settings.
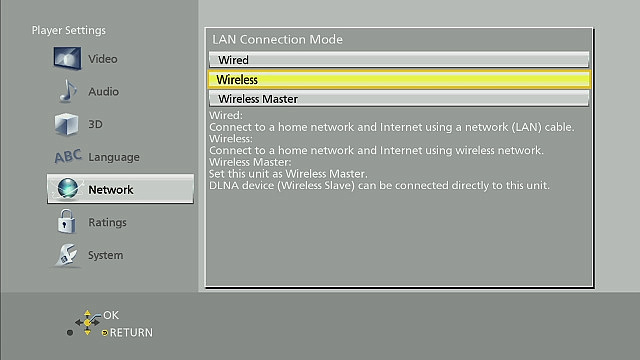
Step-6
Choose "Wireless" on the list in LAN Connection Mode. After choosing "Wireless" the display automatically moves back to "Network Settings"
* Example of Wi-Fi built-in modles
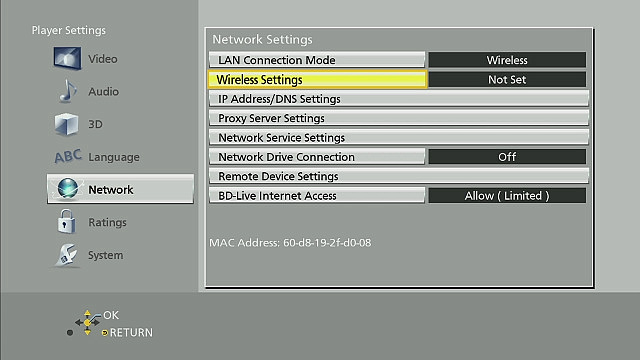
Step-7
Choose "Wireless Settings".
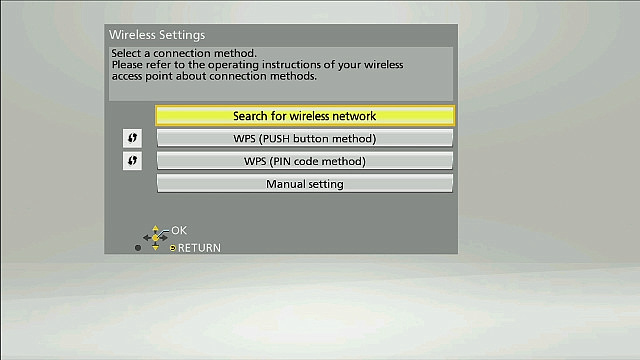
Your Panasonic Blu-ray Disc™ Player has various ways of wireless setting; searching automatically, WPS with PUSH button, WPS with PIN code and setting manually. You can choose any one of them as you want. Step-8 thru Step-16 guide you "search for wireless network" as one way of settings. In other ways, your Player's Owner's Manual (i.e. Operating Instructions) lets you know how to setup.
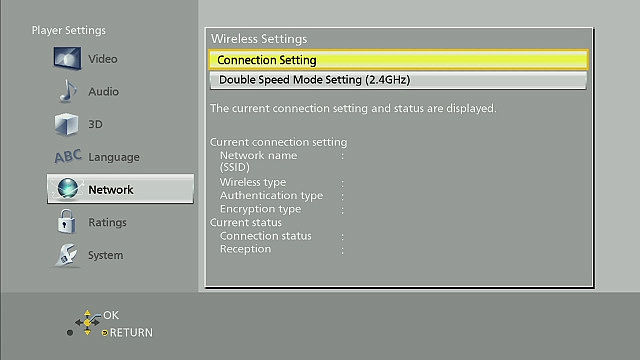
Step-8
Choose "Connection Setting" on the list in Wireless Settings.
Step-9
Choose "Search for wireless network". There are wireless networks listed on the display.
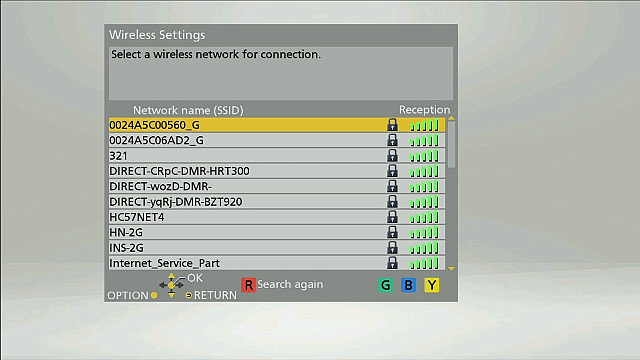
Step-10
Choose a Network name (SSID) from the list.
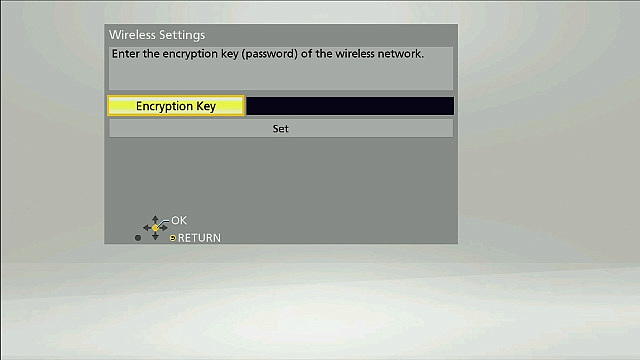
Step-11
Select Encryption Key button to enter key input. The software keyboard shows on the display.
The network that you chose should be the same wireless network where your iPhone/iPod touch/iPad or Android device connects. If you use different wireless networks between one for your iPhone/iPod touch/iPad/Android device and another one for your Panasonic Blu-ray Disc™ Player, Remote 2012 may not find your Panasonic Blu-ray Disc™ Player correctly.
If your wireless router has multiple wireless networks, you can use any two of those wireless networks; one is for your iPhone/iPod touch/iPad/Android device and another one is for Panasonic Blu-ray Disc™ Player. There may be wireless router which stops IP multicast packet. In this case, this may be solved by snooping function switching off.
Please refer to your wireless router's ower's guide.
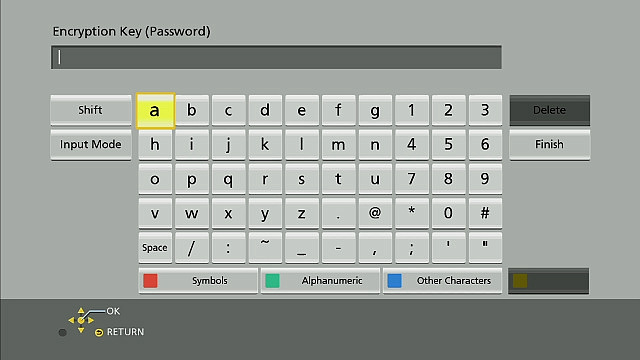
Step-12
Choose characters using software keyboard to enter Encryption Key as wireless network password.
Select "Finish" to complete Encryption Key input.
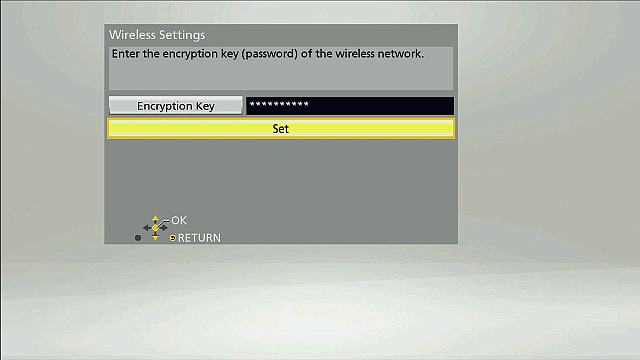
Step-13
The display automatically moves back to Wireless Settings. Choose "Set" button.
Step-14
Your player starts authentication with wireless network (Wi-Fi) which you selected.
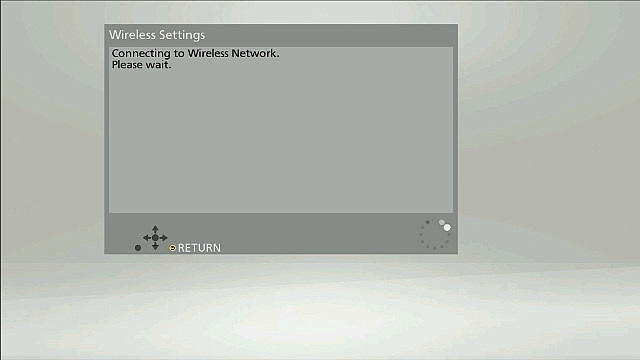
Step-15
Press OK key to proceed on your IR remote, when you see the display like below picture which shows wireless network (Wi-Fi) connection completed.
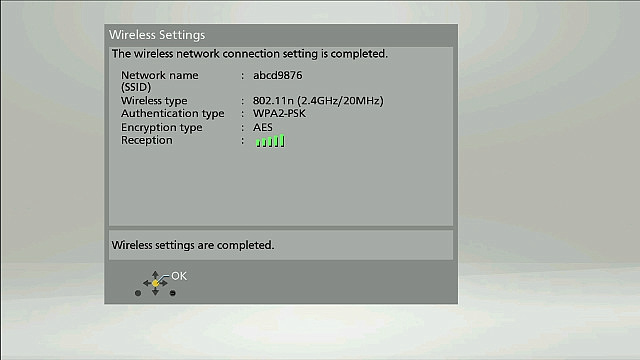
Step-16
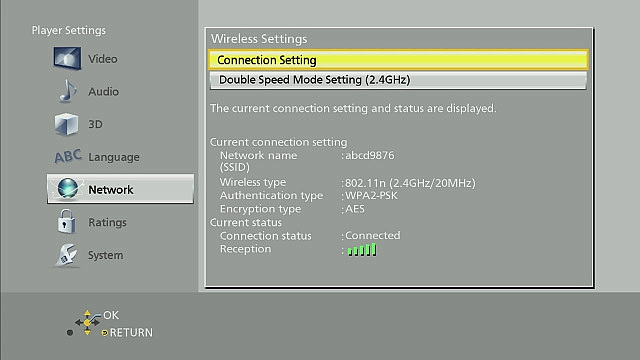
The display automatically moves back to Wireless Settings like below picture. Press RETURN key to proceed on your IR remote.
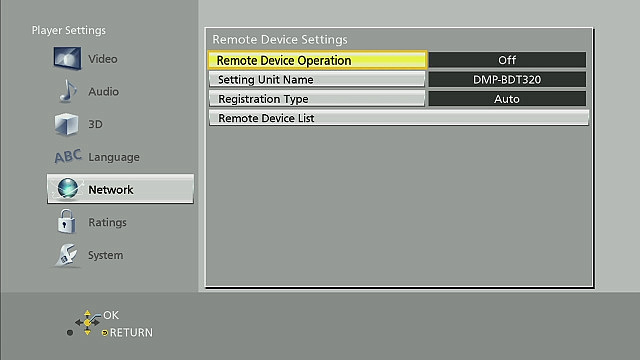
Remote Device Settings
Step-17
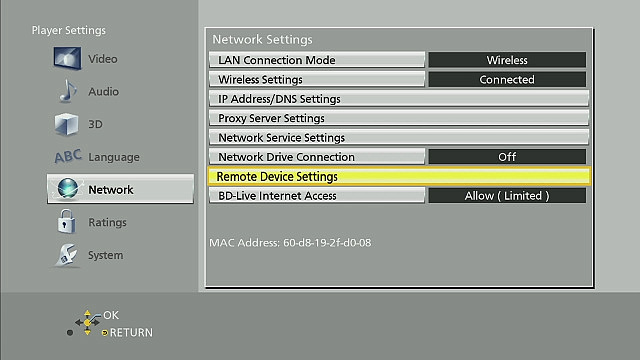
Choose "Remote Device Settings" on Network Settings.
Step-18
Choose "Remote Device Operation" on Network Settings.
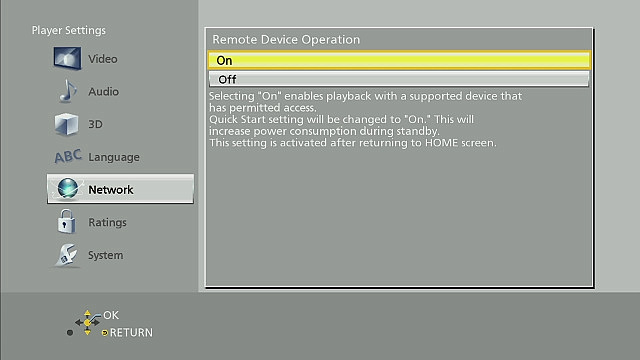
Step-19
Choose "On" on Remote Device Operation.
NOTE:
The default setting is "Off".
Step-20
The display automatically moves back to "Remote Device Settings".

Your Panasonic Blu-ray Disc™ Player can limit the remote device. E.g. only your iPhone can access your Player. Change "Registration Type" setting, from "Automatic" to "Manual" and then you can set "Enable" or "Disable" for each device in "Remote Device List".
You are now ready to enjoy your Panasonic Blu-ray Disc™ Player with Remote 2012.